> ## Documentation Index
> Fetch the complete documentation index at: https://docs.goframe.dev/llms.txt
> Use this file to discover all available pages before exploring further.
# Generate images
> Create stills, keyframes and edited images with the agent or on the Storyboard, choose a model and aspect ratio, and use the result on the timeline
Ask GoFrame Editor Agent for an image and it lands in your Media pool and, unless you say otherwise, on the timeline. Use it for title backgrounds, product shots, keyframes you'll later animate with [video generation](/editor/generate-video), or edits of an image you already have.
## Before you start
* **Credits.** Every image costs credits, and the price depends on the model (see [Options](#options)). The agent shows the cost and asks for approval before a paid run, unless you've set that skill to auto-approve in **Settings → Agent → Permissions**.
* **A plan that includes the model.** Gemini 3 Pro and FLUX.2 Pro carry the **pro** badge and need a paid plan. The other image models are available on Free.
* **Reference images (optional).** Attach images to the chat, or import them to the Media pool and mention them with `@`.
* **No footage or transcript needed.** Image generation works in an empty project.
## Ask the agent
Type a plain-language request or start with `/image-gen`. Describe the subject, setting, lighting and framing, and say what to avoid.
```text theme={null}
/image-gen a neon-lit rainy street at night, cinematic wide shot
```
```text theme={null}
Generate a clean product shot of a matte black water bottle on a light grey backdrop, soft studio light, 4:5. No text.
```
```text theme={null}
Use @headshot.png as reference and put the same person in a sunny park. Keep the face identical.
```
```text theme={null}
Edit @hero.png: make it night and add warm window lights. Keep everything else.
```
```text theme={null}
Make three variations of a hero image for a fintech landing page, 16:9, 2K, just to the Media pool.
```
 To pick the model, open the model picker (the ✦ button in the composer, or type `/model`) and choose an image model. The generation settings (the sliders icon in the composer) hold the default aspect ratio (Wide 16:9, Vertical 9:16, Square 1:1, Classic 4:3, Tall 3:4, Social 4:5, Cinematic 21:9). You can also just say it in the prompt.
## Options
| Model | Best for | Credits per image |
| ------------------------------- | ------------------------------------------------------------------------------------------------------------ | ----------------- |
| **Gemini 3 Pro** (default, pro) | Best overall quality; can look things up on the web for real-world detail; accepts up to 14 reference images | 16 |
| **Nano Banana 2** | Fast and creative; good for iterative editing | 4 |
| **Gemini 3.1 Flash** | Fast, strong instruction following | 10 |
| **FLUX.2 Pro** (pro) | Photorealism, precise prompt adherence, multi-reference editing | 16 |
| **FLUX.2 Turbo** | Fastest FLUX; best with text prompts alone | 10 |
| **Seedream v5 Lite** | Text rendering, complex compositions | 6 |
| **Seedream v4** | Aesthetic quality, character consistency | 6 |
Other settings you can ask for:
* **Aspect ratio:** 1:1, 16:9, 9:16, 4:3, 3:4, 4:5 or 21:9.
* **Size:** 1K, 2K or 4K on Gemini 3 Pro.
* **Mode:** text to image, text plus references, or an edit of an existing image ("remove the background", "make it winter"). If you attach references, the agent picks a model that accepts them.
* **What to avoid:** say "no text, no watermark" and the agent keeps it out of the prompt.
## Where the result lands and what to do next
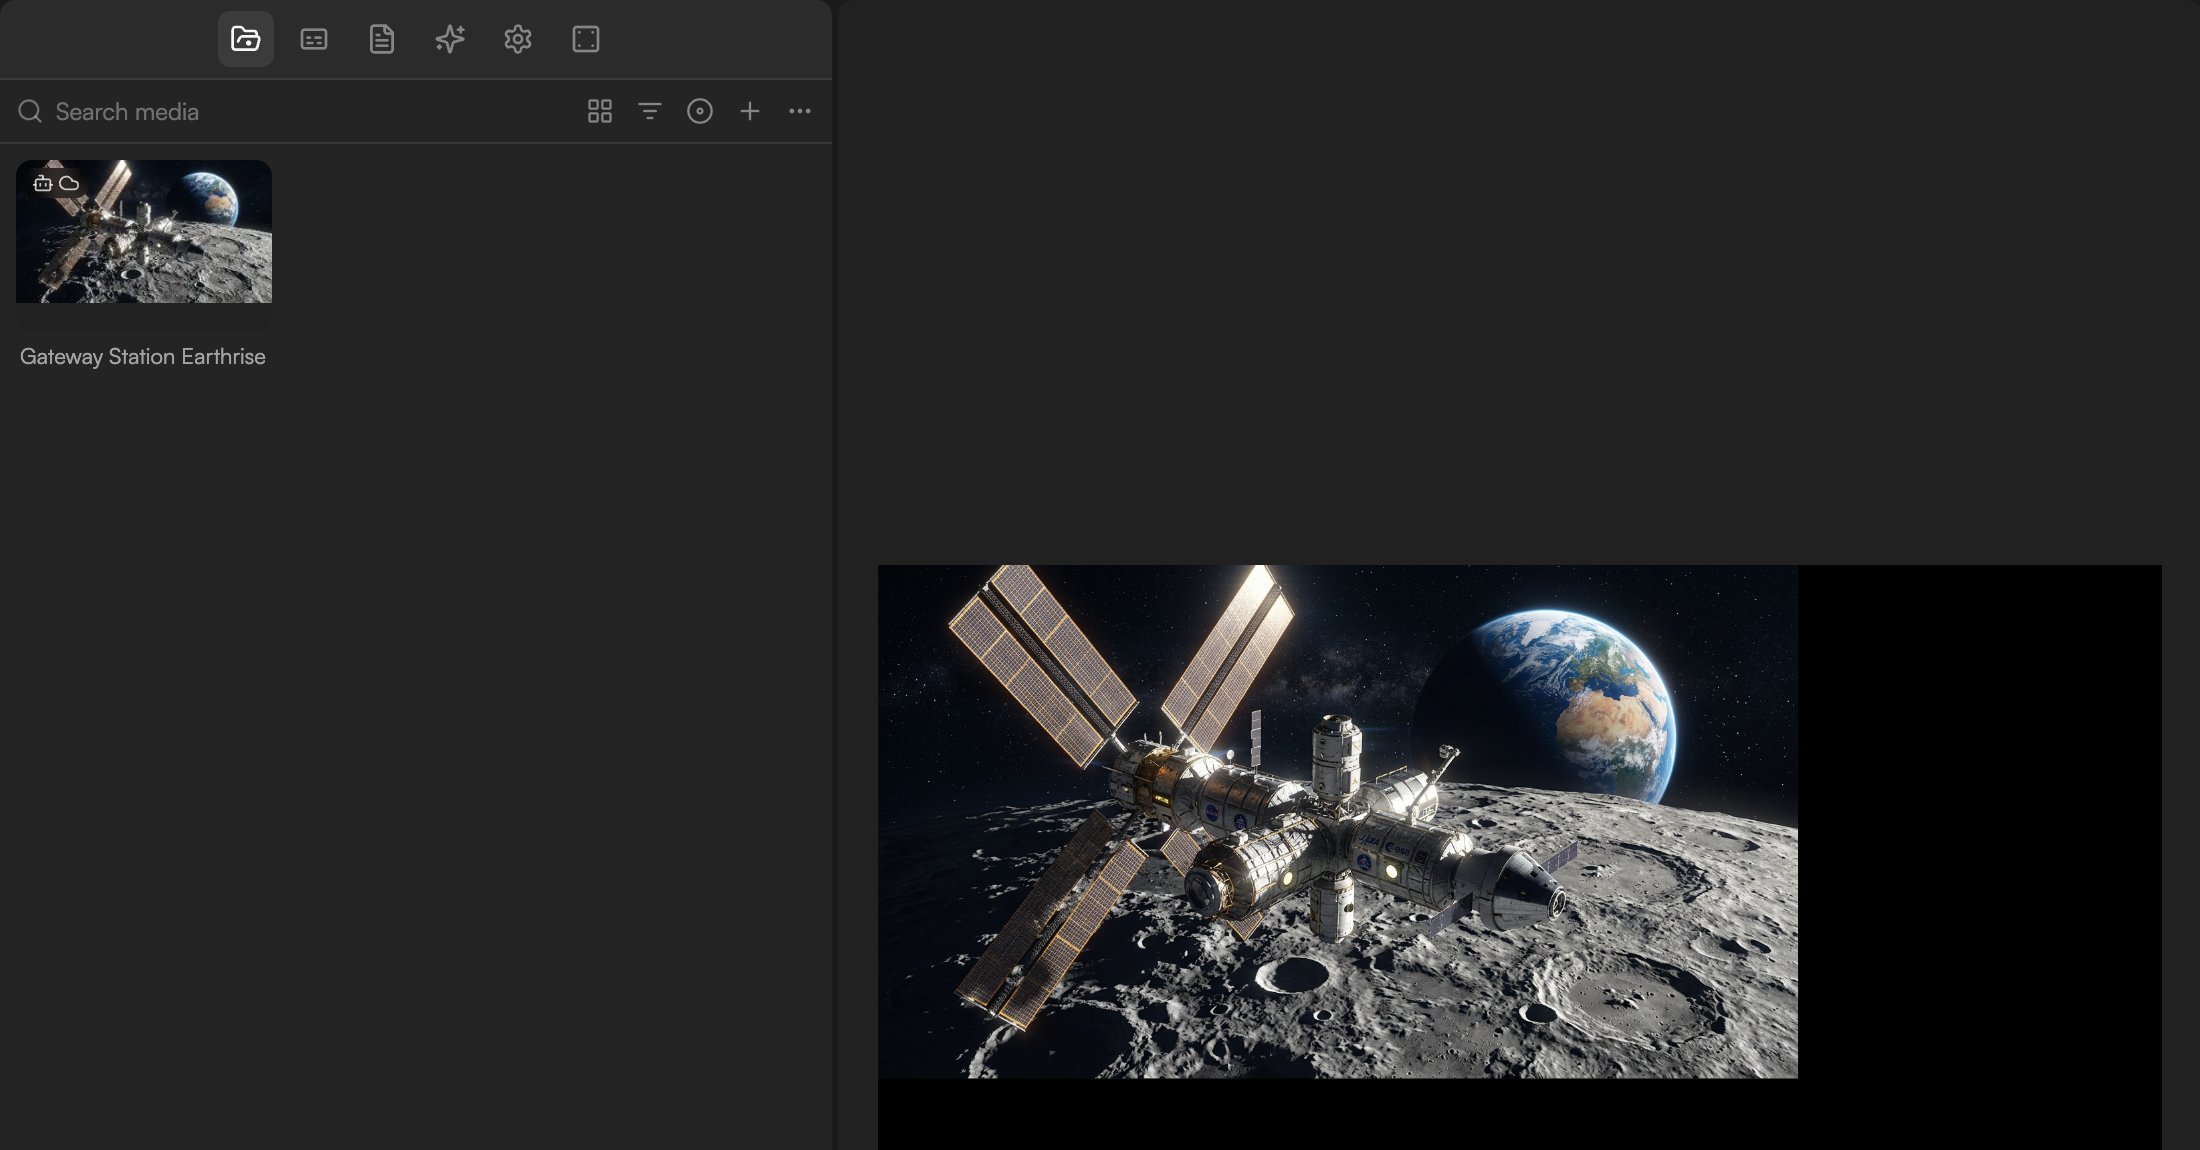
* The image is saved to the **Media pool** with the **Created by AI agent** badge (a small robot icon on the tile, next to the cloud icon). The info panel records the **Model**, **Variant** and prompt under **AI-generated**, so you can always see how it was made.
* By default the agent also places it as a clip on a video track and reports it in a **Timeline changes** card (**+1 added**). Say "just to the library" to skip that, or "at the playhead" / "after the intro clip" to control where it goes.
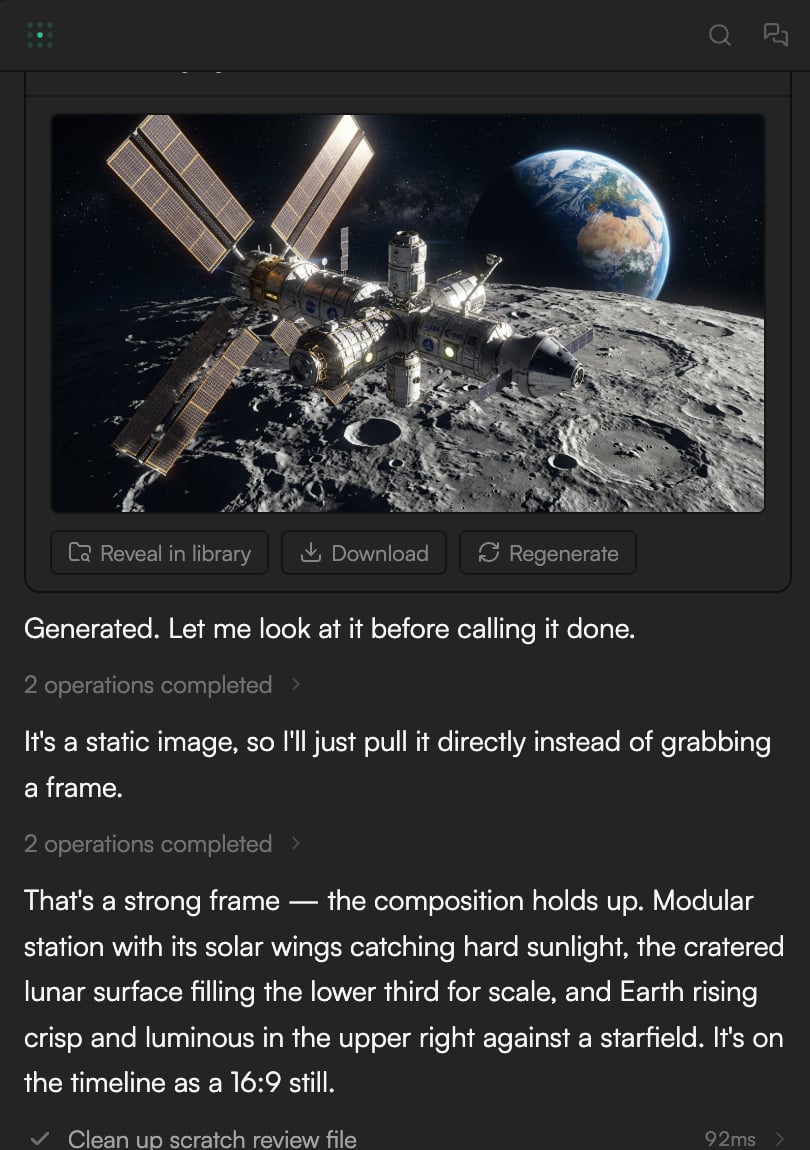
* An **Image generation** job card in the chat shows progress, then the model, your prompt and the time taken, with a preview and **Reveal in library**, **Download** and **Regenerate** buttons. **Regenerate** re-runs it with the same settings.
* Suggestion chips under the reply offer next steps, such as **Animate it into a video clip**, **Generate a couple more angles** and **Add this to the storyboard/canvas**.
* Next: move and resize it on the timeline, animate it in the [Inspector](/editor/inspector), turn it into motion with [video generation](/editor/generate-video) ("animate @image"), or sharpen it with [Upscale](/editor/upscale) before a 4K export.
To pick the model, open the model picker (the ✦ button in the composer, or type `/model`) and choose an image model. The generation settings (the sliders icon in the composer) hold the default aspect ratio (Wide 16:9, Vertical 9:16, Square 1:1, Classic 4:3, Tall 3:4, Social 4:5, Cinematic 21:9). You can also just say it in the prompt.
## Options
| Model | Best for | Credits per image |
| ------------------------------- | ------------------------------------------------------------------------------------------------------------ | ----------------- |
| **Gemini 3 Pro** (default, pro) | Best overall quality; can look things up on the web for real-world detail; accepts up to 14 reference images | 16 |
| **Nano Banana 2** | Fast and creative; good for iterative editing | 4 |
| **Gemini 3.1 Flash** | Fast, strong instruction following | 10 |
| **FLUX.2 Pro** (pro) | Photorealism, precise prompt adherence, multi-reference editing | 16 |
| **FLUX.2 Turbo** | Fastest FLUX; best with text prompts alone | 10 |
| **Seedream v5 Lite** | Text rendering, complex compositions | 6 |
| **Seedream v4** | Aesthetic quality, character consistency | 6 |
Other settings you can ask for:
* **Aspect ratio:** 1:1, 16:9, 9:16, 4:3, 3:4, 4:5 or 21:9.
* **Size:** 1K, 2K or 4K on Gemini 3 Pro.
* **Mode:** text to image, text plus references, or an edit of an existing image ("remove the background", "make it winter"). If you attach references, the agent picks a model that accepts them.
* **What to avoid:** say "no text, no watermark" and the agent keeps it out of the prompt.
## Where the result lands and what to do next
* The image is saved to the **Media pool** with the **Created by AI agent** badge (a small robot icon on the tile, next to the cloud icon). The info panel records the **Model**, **Variant** and prompt under **AI-generated**, so you can always see how it was made.
* By default the agent also places it as a clip on a video track and reports it in a **Timeline changes** card (**+1 added**). Say "just to the library" to skip that, or "at the playhead" / "after the intro clip" to control where it goes.
* An **Image generation** job card in the chat shows progress, then the model, your prompt and the time taken, with a preview and **Reveal in library**, **Download** and **Regenerate** buttons. **Regenerate** re-runs it with the same settings.
* Suggestion chips under the reply offer next steps, such as **Animate it into a video clip**, **Generate a couple more angles** and **Add this to the storyboard/canvas**.
* Next: move and resize it on the timeline, animate it in the [Inspector](/editor/inspector), turn it into motion with [video generation](/editor/generate-video) ("animate @image"), or sharpen it with [Upscale](/editor/upscale) before a 4K export.
 ## Do it from the Storyboard
The chat is the primary way to generate, but you can also work visually. Open the **Storyboard** tab in the footer. The prompt bar at the bottom of the board has a model chip and an **Add Models** button, type icons for image, video and audio, an aspect menu, a variants selector (**Auto** by default) and an enhance-prompt button. Type a prompt and the images appear as nodes on the board, where you can compare options before bringing one to the timeline. See [Storyboard](/editor/storyboard).
## Tips
* One subject, one setting, one light. Prompts that pack several ideas produce muddled images.
* For a set of images that must match (a character across scenes, a product in several settings), generate one hero image first and reference it in every following prompt.
* If the composition is right but the resolution isn't, [upscale](/editor/upscale) instead of regenerating. If hands, text or faces are wrong, regenerate; upscaling only enlarges the defects.
* Run `/visual-identity` once per project with a few style words, and the agent applies that palette and mood to every image, video and motion graphic it generates.
## Related
* [Generate video](/editor/generate-video)
* [Upscale images and video](/editor/upscale)
* [Storyboard](/editor/storyboard)
* [AI models](/editor/ai-models)
## Do it from the Storyboard
The chat is the primary way to generate, but you can also work visually. Open the **Storyboard** tab in the footer. The prompt bar at the bottom of the board has a model chip and an **Add Models** button, type icons for image, video and audio, an aspect menu, a variants selector (**Auto** by default) and an enhance-prompt button. Type a prompt and the images appear as nodes on the board, where you can compare options before bringing one to the timeline. See [Storyboard](/editor/storyboard).
## Tips
* One subject, one setting, one light. Prompts that pack several ideas produce muddled images.
* For a set of images that must match (a character across scenes, a product in several settings), generate one hero image first and reference it in every following prompt.
* If the composition is right but the resolution isn't, [upscale](/editor/upscale) instead of regenerating. If hands, text or faces are wrong, regenerate; upscaling only enlarges the defects.
* Run `/visual-identity` once per project with a few style words, and the agent applies that palette and mood to every image, video and motion graphic it generates.
## Related
* [Generate video](/editor/generate-video)
* [Upscale images and video](/editor/upscale)
* [Storyboard](/editor/storyboard)
* [AI models](/editor/ai-models)