

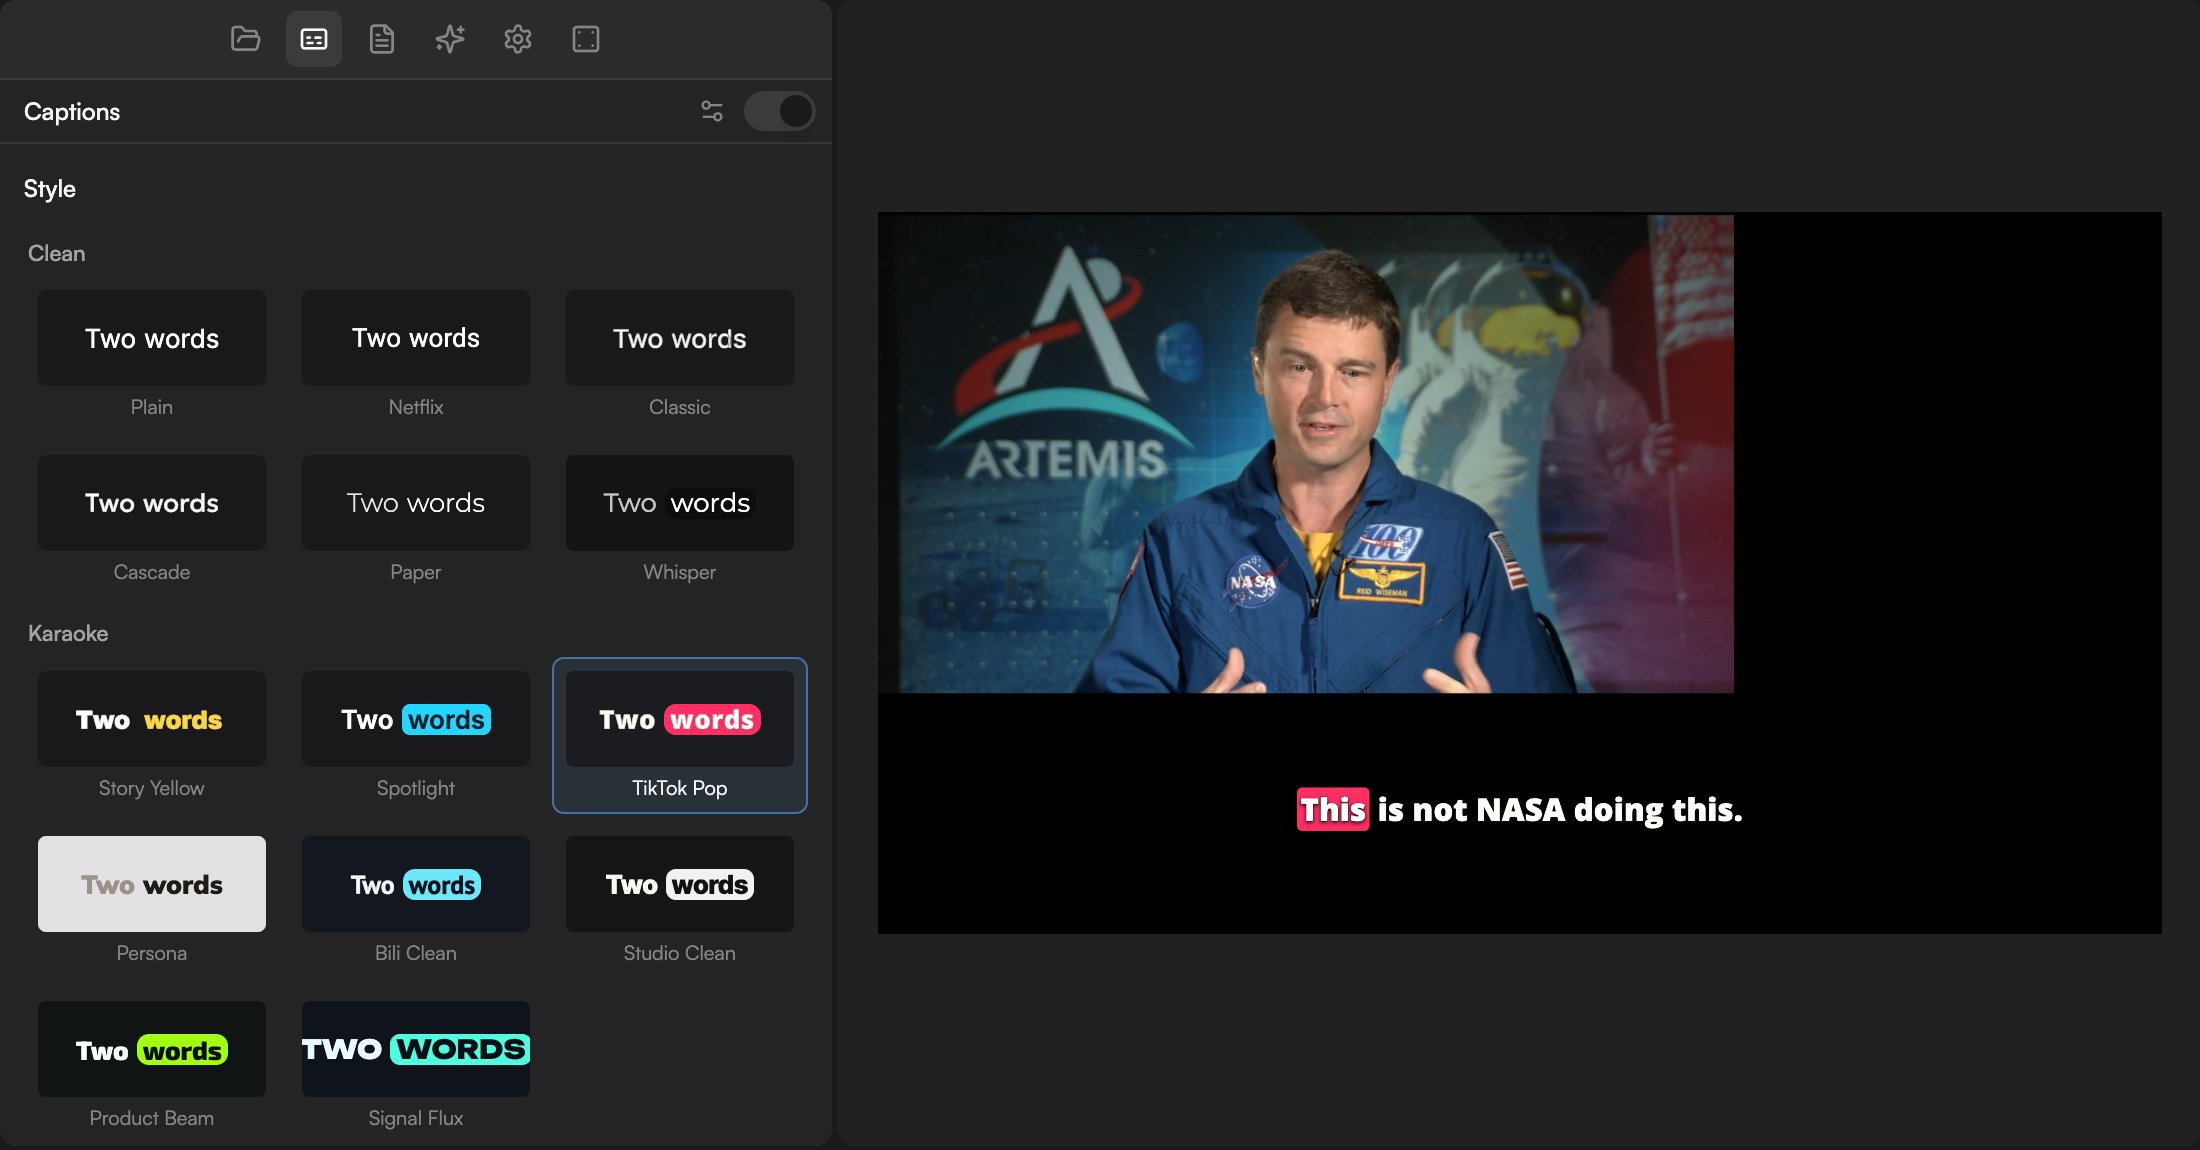
Turn captions on
1
Put speech on the Timeline
Captions need at least one video or audio clip with speech on the Timeline.
2
Transcribe
If the clips have no transcript, the panel reads Captions are built from the transcript with a Transcribe N files button. Click it and wait for the transcript. See Transcribe media for settings and cost.
3
Show captions
When the transcript lands, captions switch on by themselves (Transcript ready — captions turned on). Use the Show captions switch in the panel header to hide or show them. While hidden, a banner reads Captions are hidden in the preview with a Turn on button.
Source track
In the panel’s settings (the settings icon in the header), Source track decides which clips feed the captions. Auto uses every transcribed video or audio clip on the Timeline. Pick a specific track when, for example, an interview and a voiceover overlap and you only want one of them captioned.Presets
The Style section is a gallery of presets in four groups; each tile previews its look with the words “Two words”.
Clean presets are quiet, subtitle-style looks. Karaoke presets light up each word as it is spoken. Editorial presets lean on typography. Loud presets are the bold, social-first styles.
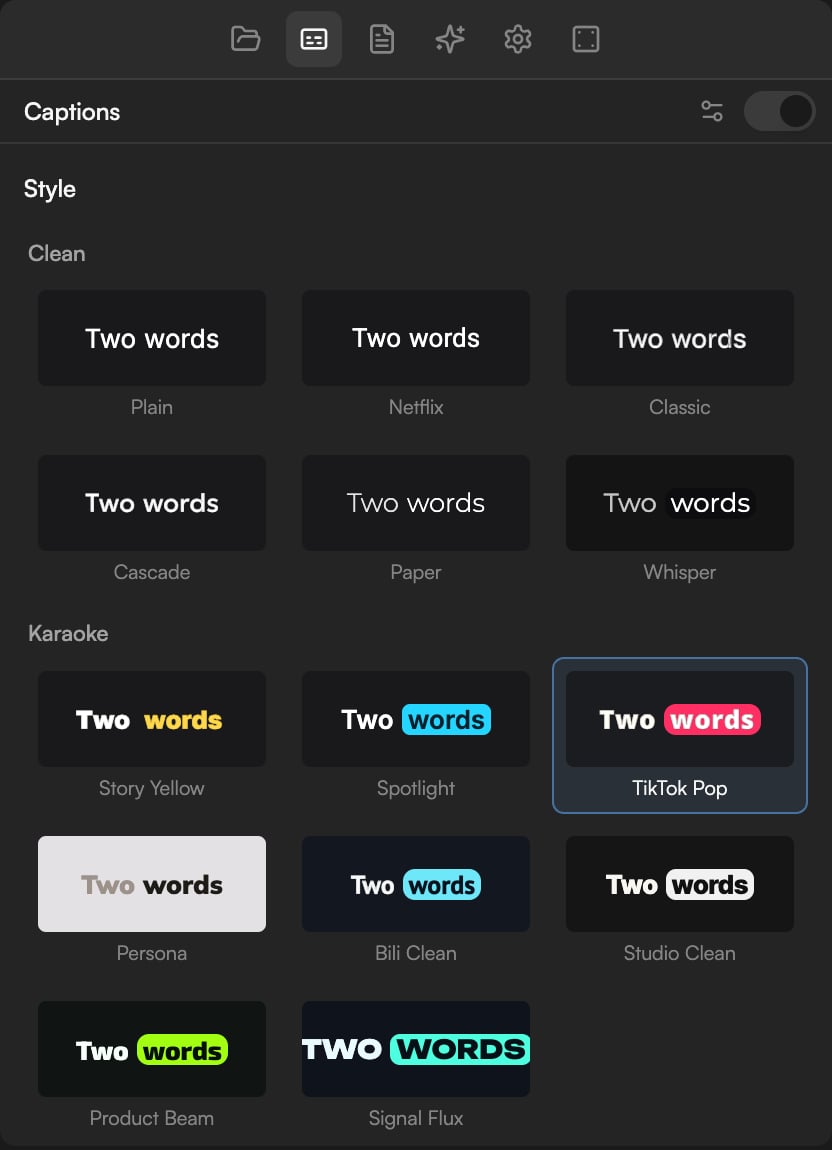
- Apply, keep my adjustments: switch the base look but keep the font, size, position and other changes you made.
- Reset to preset look: discard your adjustments and return to the pure preset.
Fine-tune
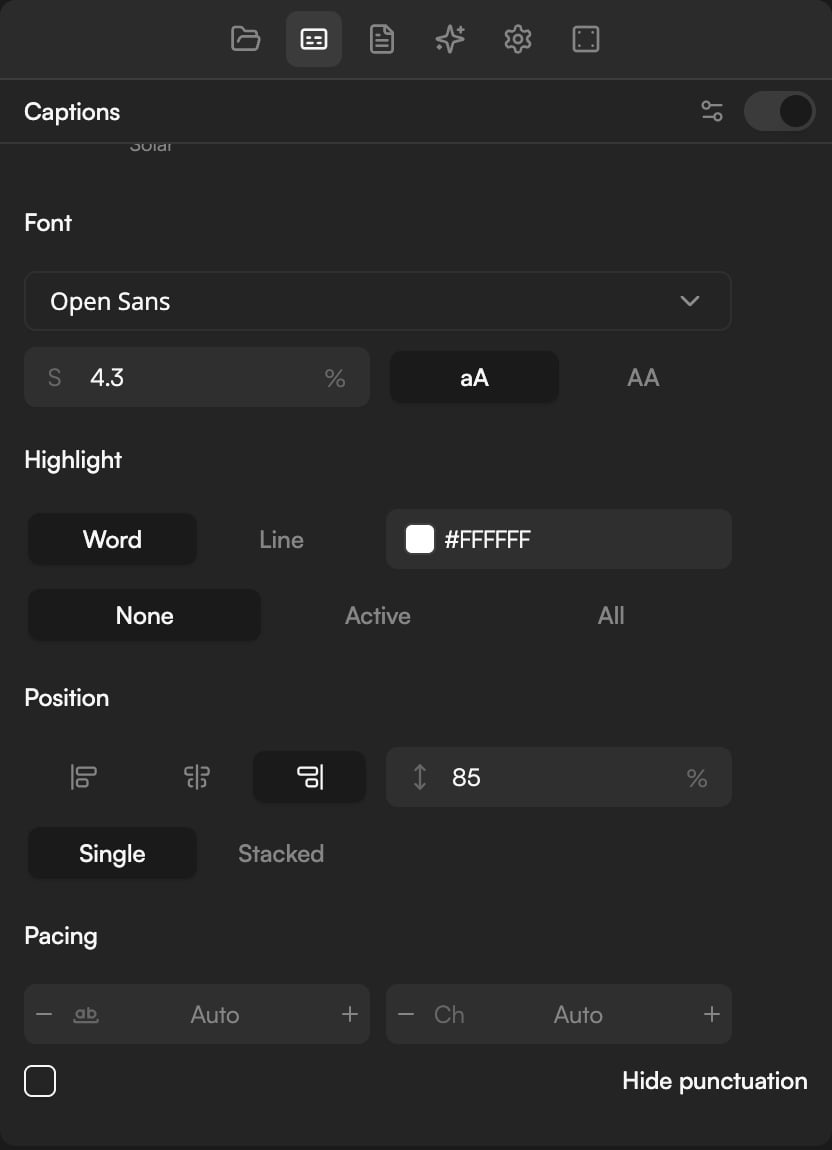
Every control below sits under the preset gallery and applies on top of the chosen preset.Font and size
- Font: a dropdown of caption fonts (for example Open Sans).
- S: font size as a percentage of the frame (for example 4.3), so captions scale correctly when you change the project aspect ratio.
- aA / AA: keep the transcript’s capitalization, or force capitals.
Highlight
- Word highlights the word being spoken; Line highlights the whole current line.
- The colour swatch next to it (for example #FFFFFF) overrides the highlight colour, so every highlighted word uses your colour.
- Word boxes draw rounded boxes behind words: None turns them off; Active boxes only the spoken word; All boxes every word on the page.
Position and layout
- Position: three alignment buttons (top, centre, bottom) plus a vertical offset (↕) as a percentage of the frame, for fine placement above a lower third or below a subject’s face.
- Single shows one line at a time; Stacked shows the current page as multiple lines.
Pacing
- words: how many words appear together. Auto follows the preset (fast karaoke presets show fewer words; clean presets show more); use − and + to set a number.
- Ch: the maximum characters per line, where a line wraps. Auto wraps by the available width; use − and + to set a number.
- Hide punctuation: drop commas, periods and similar marks from the captions without touching the transcript.
Edit caption text
Captions read the transcript, so text fixes happen there: open the Transcript panel, select the word and choose Edit. Deleting words in the Transcript panel cuts them from the video and the captions together, and Hide keeps a word in the video but out of the captions. See Edit video by editing text.Word timing lane
For frame-accurate control, open the caption lane on the Timeline: click the CC button in the Timeline toolbar. The lane appears as a row of word chips above V1, one per caption word, with page boundaries marked.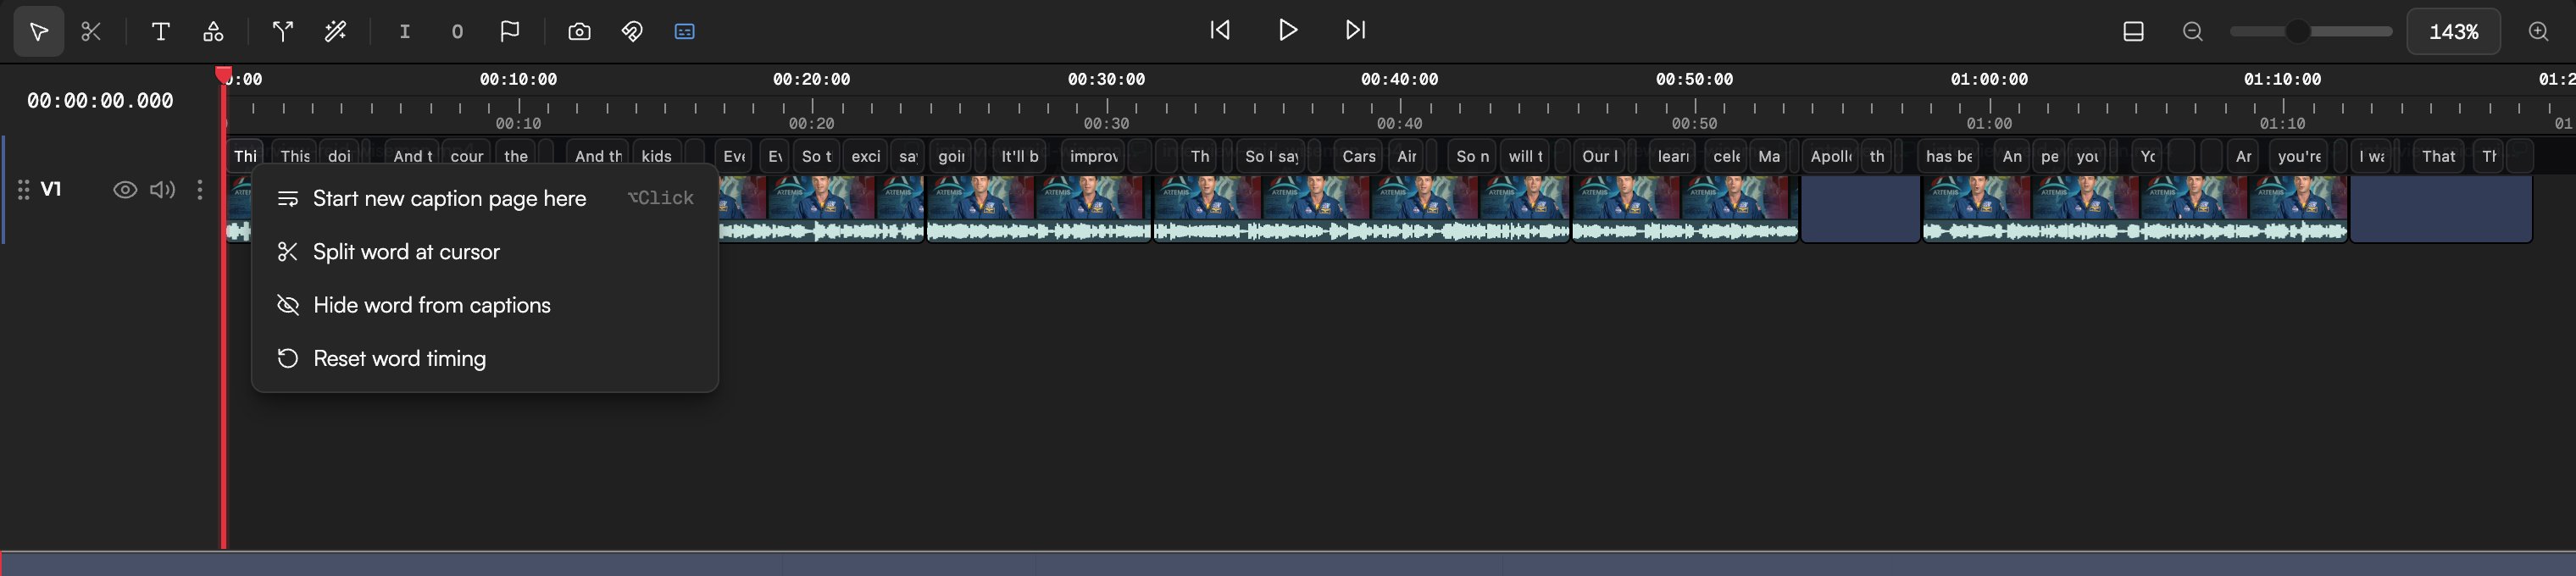
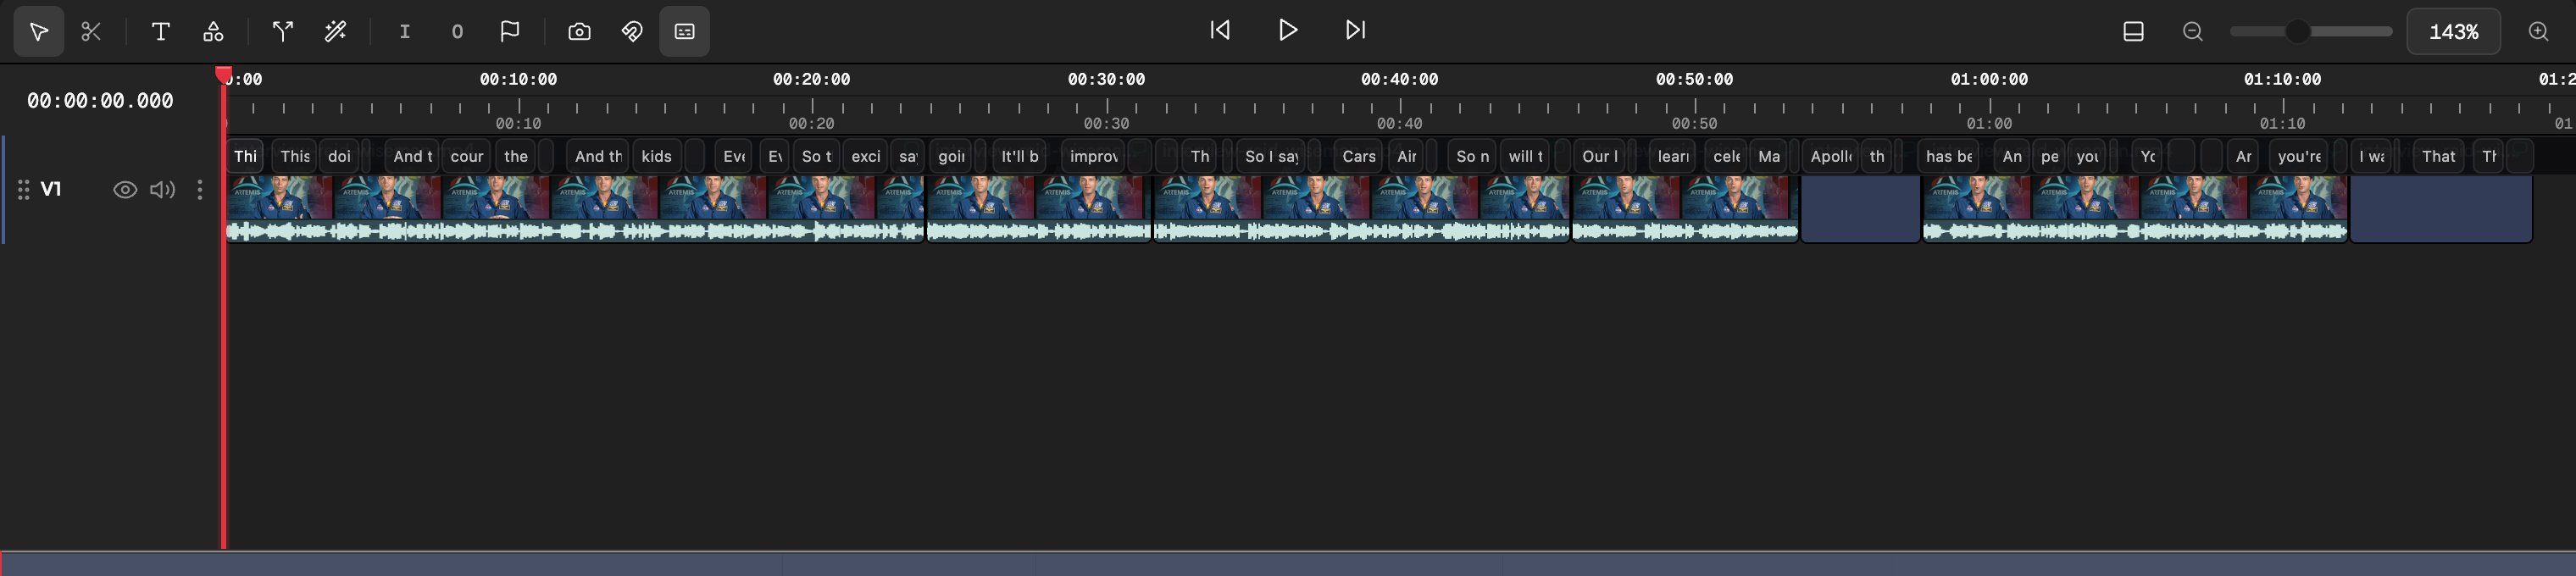
- Retime a word: drag a word chip, or its edges, to move where it lights up.
- Right-click a word for the lane menu:
Timing edits, hides and page breaks are stored with the project and survive preset changes. If you re-transcribe the asset, check them afterwards, as they were made on the old transcript.
Captions on export
- Video file exports burn captions into the picture. The Export Settings dialog notes Captions will be burned in frame by frame — this export is slower than usual.
- Project for editing (NLE) exports do not render captions into the video. Turn on Include captions (.srt) on that tab and the package includes an
.srtsidecar you can import into Final Cut Pro, Premiere Pro or DaVinci Resolve. See Export for Final Cut, Premiere and Resolve. - Caption styling is not carried into NLE exports; only the words and timings are.
Ask the agent
The agent can do everything in this panel and pick sensible defaults for the format:- “Add karaoke captions in TikTok Pop, uppercase, centered.”
- “Switch the captions to Netflix and move them to the bottom.”
- “Make the captions bigger and show three words per page.”
- “Hide punctuation in captions.”
/captions skill; see Skills and workflows. The Transcript panel’s ⋯ menu also has an Add captions shortcut.