

Which sections you see
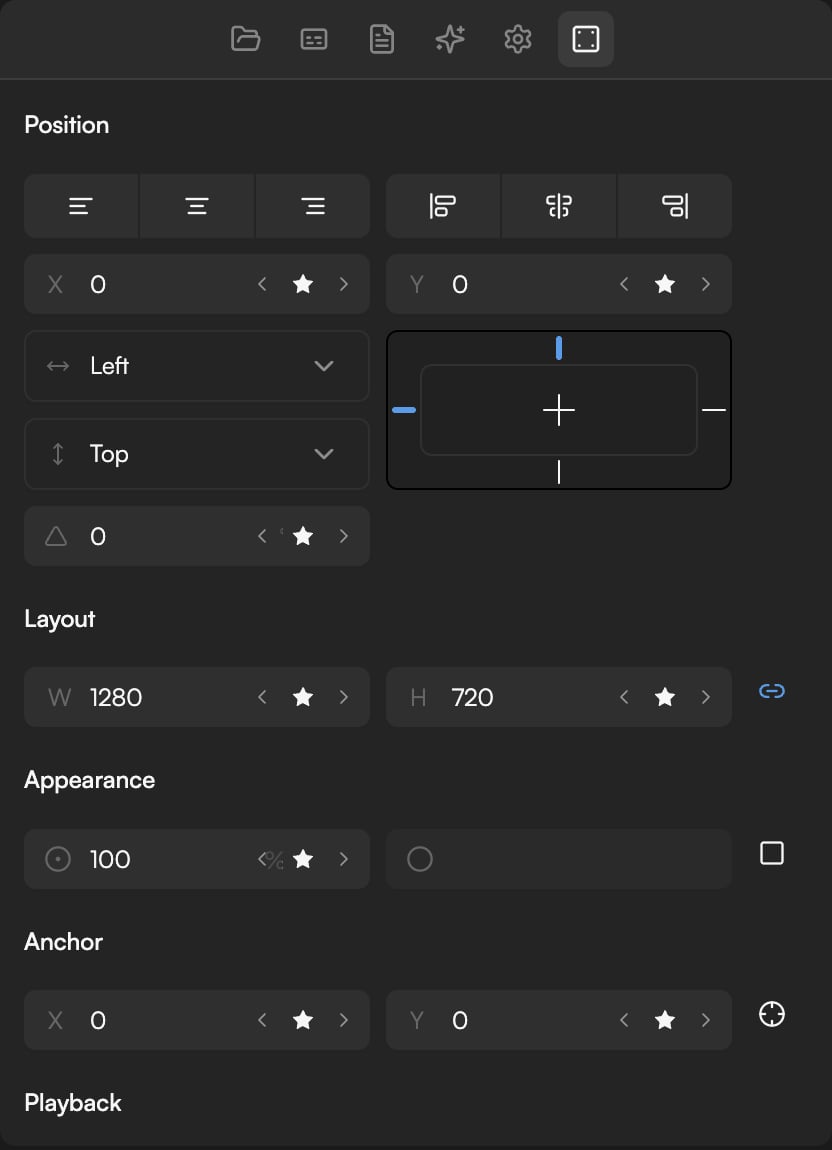
Position
- X and Y set where the clip sits on the canvas, in pixels. The rotation field (°) turns the clip around its anchor.
- The row of buttons aligns the clip to the canvas: left, horizontal centre, right, top, vertical centre and bottom.
- Two constraint pickers (Left and Top by default) decide how the clip follows the canvas when the project size changes in Project settings.
Layout
W and H in pixels. The link button between them keeps the proportions when you change one of them.Appearance
- Opacity from 0 to 100.
- Corner radius rounds the clip’s corners.
- A blend-mode button sits at the end of the row.
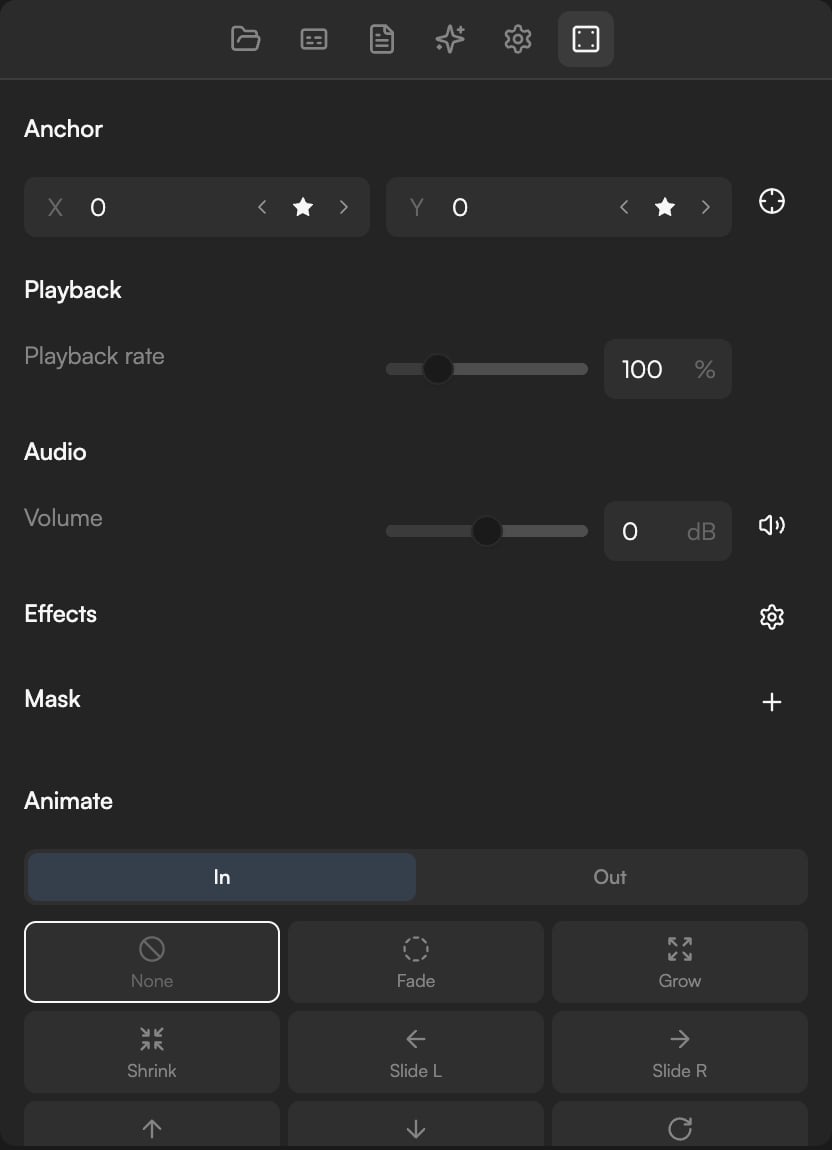
Anchor
X and Y set the point the clip rotates and scales around, as a fraction of its size: 0.5 and 0.5 is the centre, 0 and 0 the top-left corner.Playback
Playback rate changes the speed of a video or audio clip as a percentage, from 20% (slow motion) to 400%.Audio
Volume in dB runs from −60 dB (silent) to +60 dB; 0 dB is the original level. To silence a whole track instead, use the speaker button on its header in the Timeline. To fade sound in or out, use the Gain preset in the Animate section, or keyframe the volume; see Animate clips with presets and keyframes. To lower music under speech across the whole project, ask the agent; see Music and sound effects.Effects
Click the settings button in the Effects header to open Effect Styles. The Filters group holds six colour controls:
Use Reset in the popover to return every filter to its default.
Mask
A mask shows only part of the clip. Click Add Mask in the section header, then choose a shape:- Rectangle: Distance left, Distance top, Width, Height and a corner Radius.
- Circle: Horizontal center, Vertical center, Width and Height (an ellipse when the two differ).
Shadow
Images and shapes have a Shadow section. Click Add Shadow, then the Configure Shadow button, to set a Drop Shadow with Offset X, Offset Y, Blur and Color. Remove Shadow takes it off again. Text has its own Shadow section with the same fields, alongside Scale, Stroke, Glow and Text FX; see Text and shapes.Animate
Animate holds In and Out presets: None, Fade, Grow, Shrink, Slide L, Slide R, Slide Up, Slide Dn, Spin and Twist. As the section notes, “Applying a preset replaces existing keyframes of the properties it animates.” Durations, easing and hand-placed keyframes are covered in Animate clips with presets and keyframes.Working on the canvas
Preview doubles as a canvas: text and shape clips can be selected, moved and resized there directly, with alignment and distribution tools and an eyedropper for colours. Right-click a clip in Preview for:- Bring forward and Send backward to change stacking order between overlapping clips
- Copy properties and Paste properties to carry position, size, opacity and effects from one clip to another