

⌘. to switch layouts; the panel toggles in the top bar show or hide it while you are in Editor). Make sure the Timeline tab, not Storyboard, is selected in the footer. See Editor layout.
Tracks
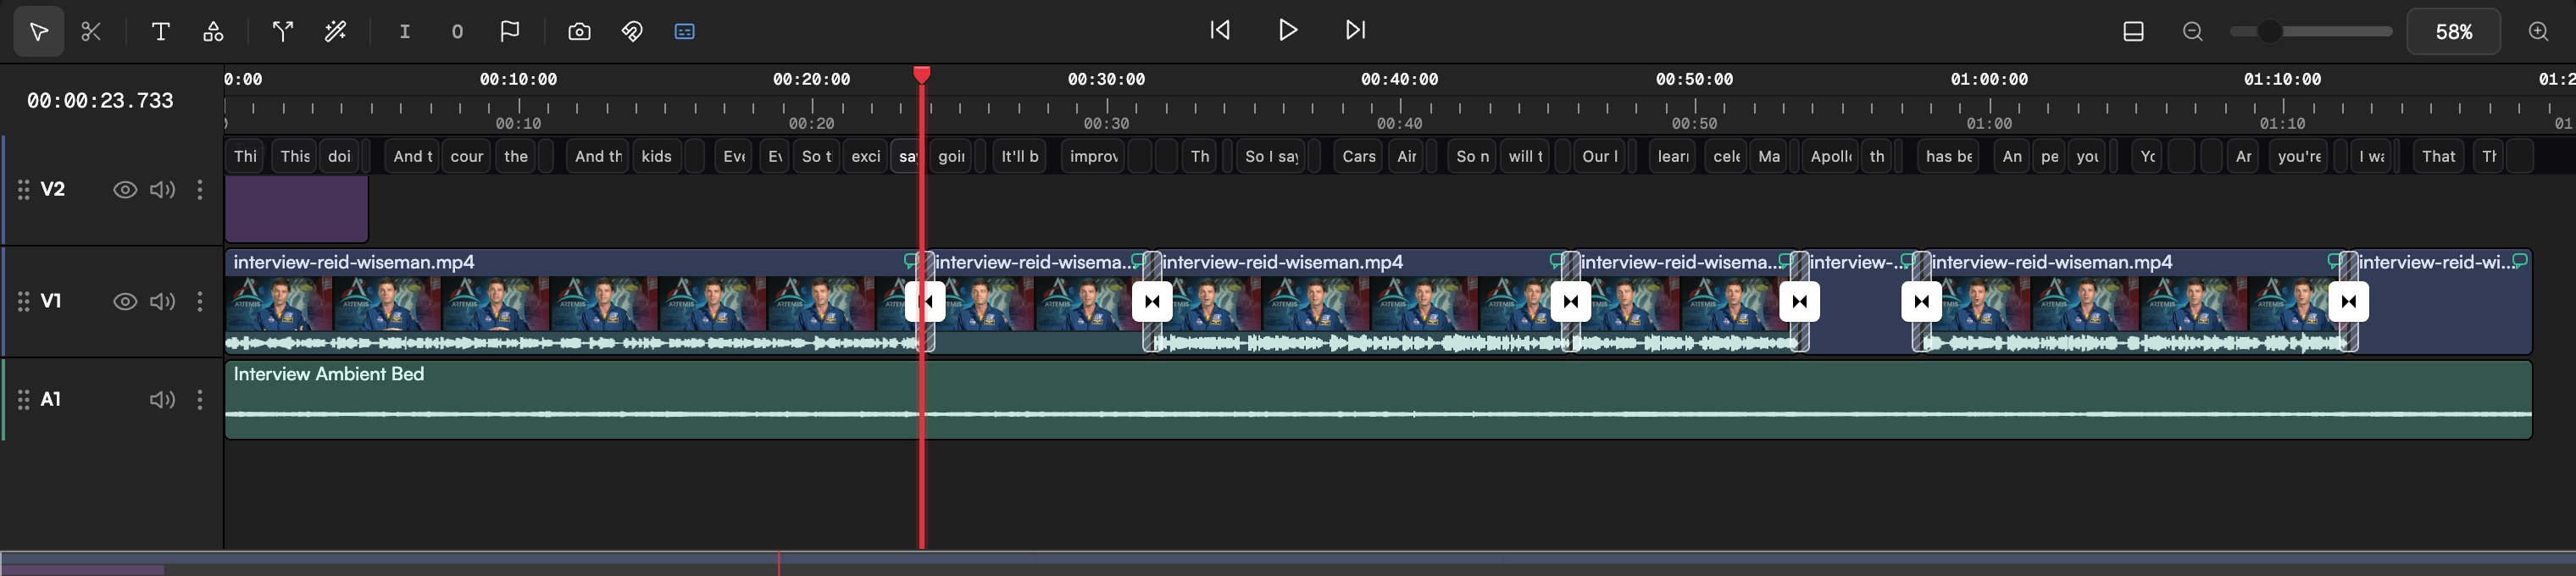
Tracks are stacked rows. Video tracks are named V1, V2 and so on and hold video, images, text, shapes, captions and motion graphics; higher-numbered video tracks render on top of lower ones in Preview. Audio tracks are named A1, A2 and so on and hold audio clips. Each track header shows the name, an eye button to hide the track, a speaker button to mute it, a ⋮ menu and a drag handle. An empty Timeline shows the hint Drag media here — or ask the agent to build your edit. Drop a file from the Media pool onto a track, or onto the + New video track / + New audio track target below the last track to create a track as you drop. Tracks also appear when they are needed: adding a text clip with Add text (T) on a one-track project creates V2 for it.
To add an empty track without dropping anything, open the command palette (⌘P) and run Add Video track or Add Audio track. Drag a track header by its handle to reorder tracks.
Track menu
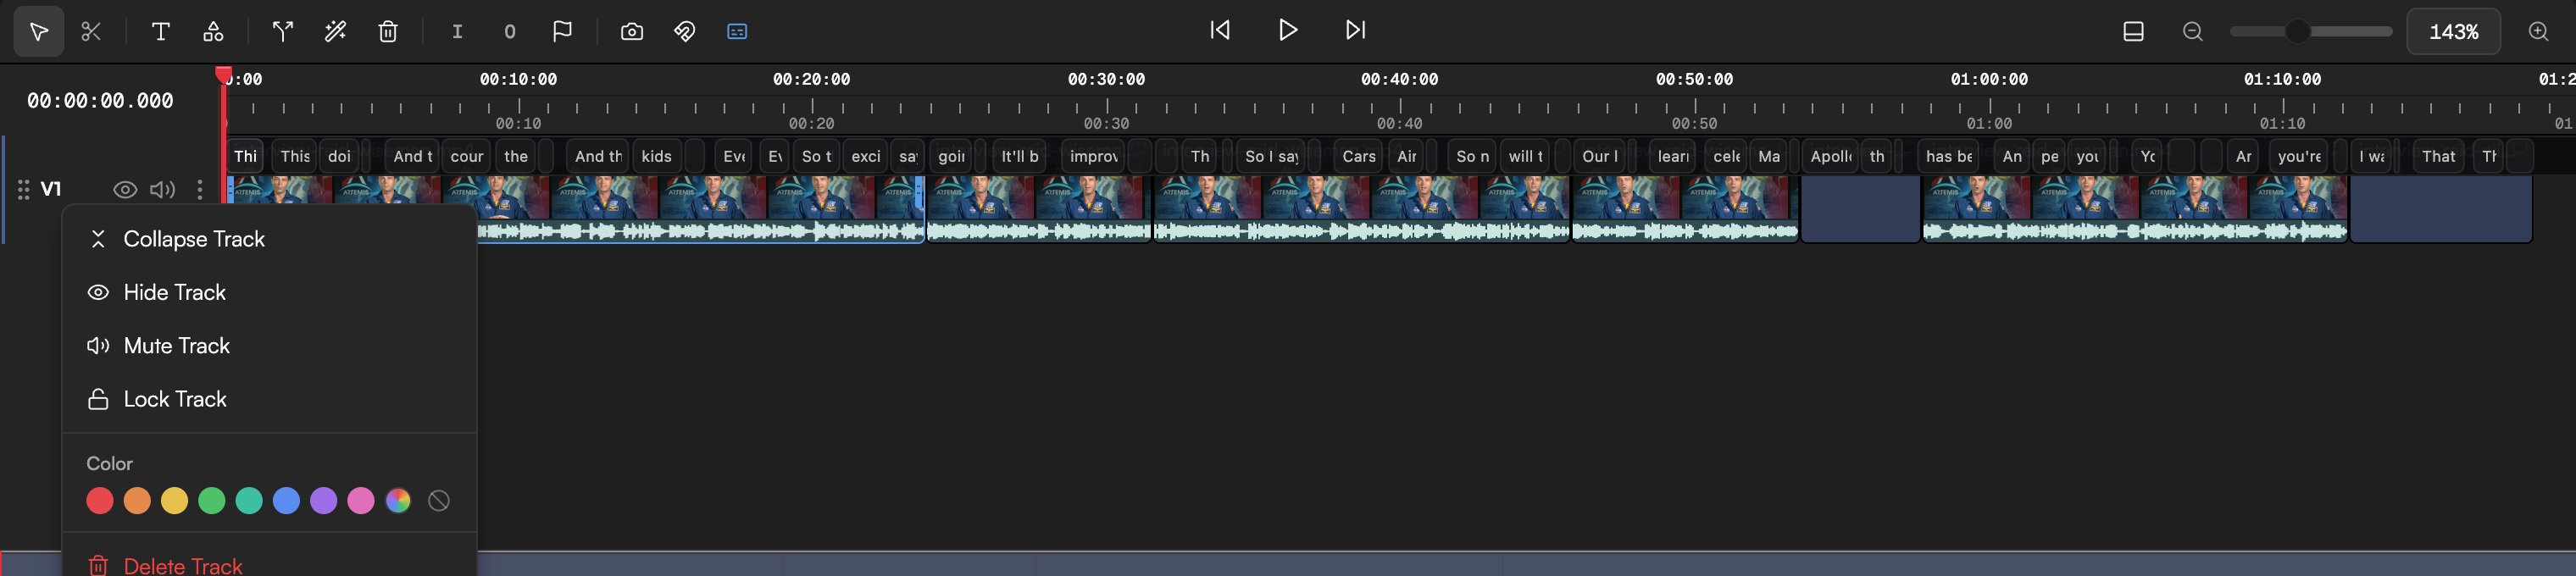
Open the ⋮ menu on a track header for:- Collapse Track / Expand Track: shrink the row to save space. This is a view setting only; it does not change the edit.
- Hide Track / Show Track (video tracks): hide the picture in Preview and export without deleting anything.
- Mute Track / Unmute Track: silence the track.
- Lock Track / Unlock Track: protect the track from accidental edits.
- Color: pick one of eight swatches, choose Custom color…, or Reset color.
- Delete Track: removes the track and every clip on it (undoable with
⌘Z).
Playhead and transport
The playhead marks the frame shown in Preview. Click anywhere on the time ruler to move it, or drag it. The transport buttons in the middle of the toolbar are go to start, play / pause and go to end. The camera button in the toolbar exports the current frame as an image.
The Timeline runs at 30 fps. Frame stepping and keyframe positions use that grid; you choose a different frame rate at export time if you need one.
Zoom and navigation
- Use the zoom controls at the right of the toolbar (−, a slider, the current percentage and +; 5% to 400%), or hold
Ctrland scroll (pinch on a trackpad). ⇧+ scroll moves the Timeline sideways; plain scroll moves it up and down.- Right-click an empty area and choose Zoom to Fit to see the whole project. The command palette also has Zoom to 100%, Zoom in and Zoom out.
- Click the minimap toggle next to the zoom controls for an overview strip of the whole Timeline; click it again to close it.
Snapping
Snapping makes clip edges, the playhead and markers “stick” to each other while you drag, so cuts land exactly on a frame boundary or on a neighbouring clip. Toggle it with the magnet button in the toolbar, or pressN. Hold the same rules in mind when you trim: see Edit clips.
Markers
Markers are labelled points on the ruler. Use them for notes, beats or places you want the agent to look at. The Export Settings dialog can also render only up to a marker.- Press
Mor click the marker flag in the toolbar to add one at the playhead. Right-clicking an empty area also offers Add Marker. - Click a marker to open it in the Inspector, which shows Name, Color (eight swatches), Time and Remove marker.
- Press
⇧Mto jump to the next marker and⌘Mto jump to the previous one.

In/Out zone
The In/Out zone is a highlighted range on the ruler. Its main job is to define the export range: when a zone is set, the Export dialog can render just that part. See Export video.- Press
Ior click the In button in the toolbar to mark the start at the playhead. - Press
Oor click the Out button to mark the end. - Press
⇧Xto remove the zone; the empty-area right-click menu has Clear In/Out too.
Command palette and shortcuts
Press⌘P (or ⌘⇧P) to open the command palette: a Search field with results grouped as Tools, Edit, Navigation, View, Timeline, Tracks and AI. Almost everything in the toolbar and the context menus is available here, which is handy when you forget a key.
Press ? for the shortcuts overlay. The default keys above belong to the goframe (Default) preset; if you switched to the Premiere Pro, DaVinci Resolve or Final Cut Pro preset in Settings → Shortcuts, some keys differ. See Keyboard shortcuts.