

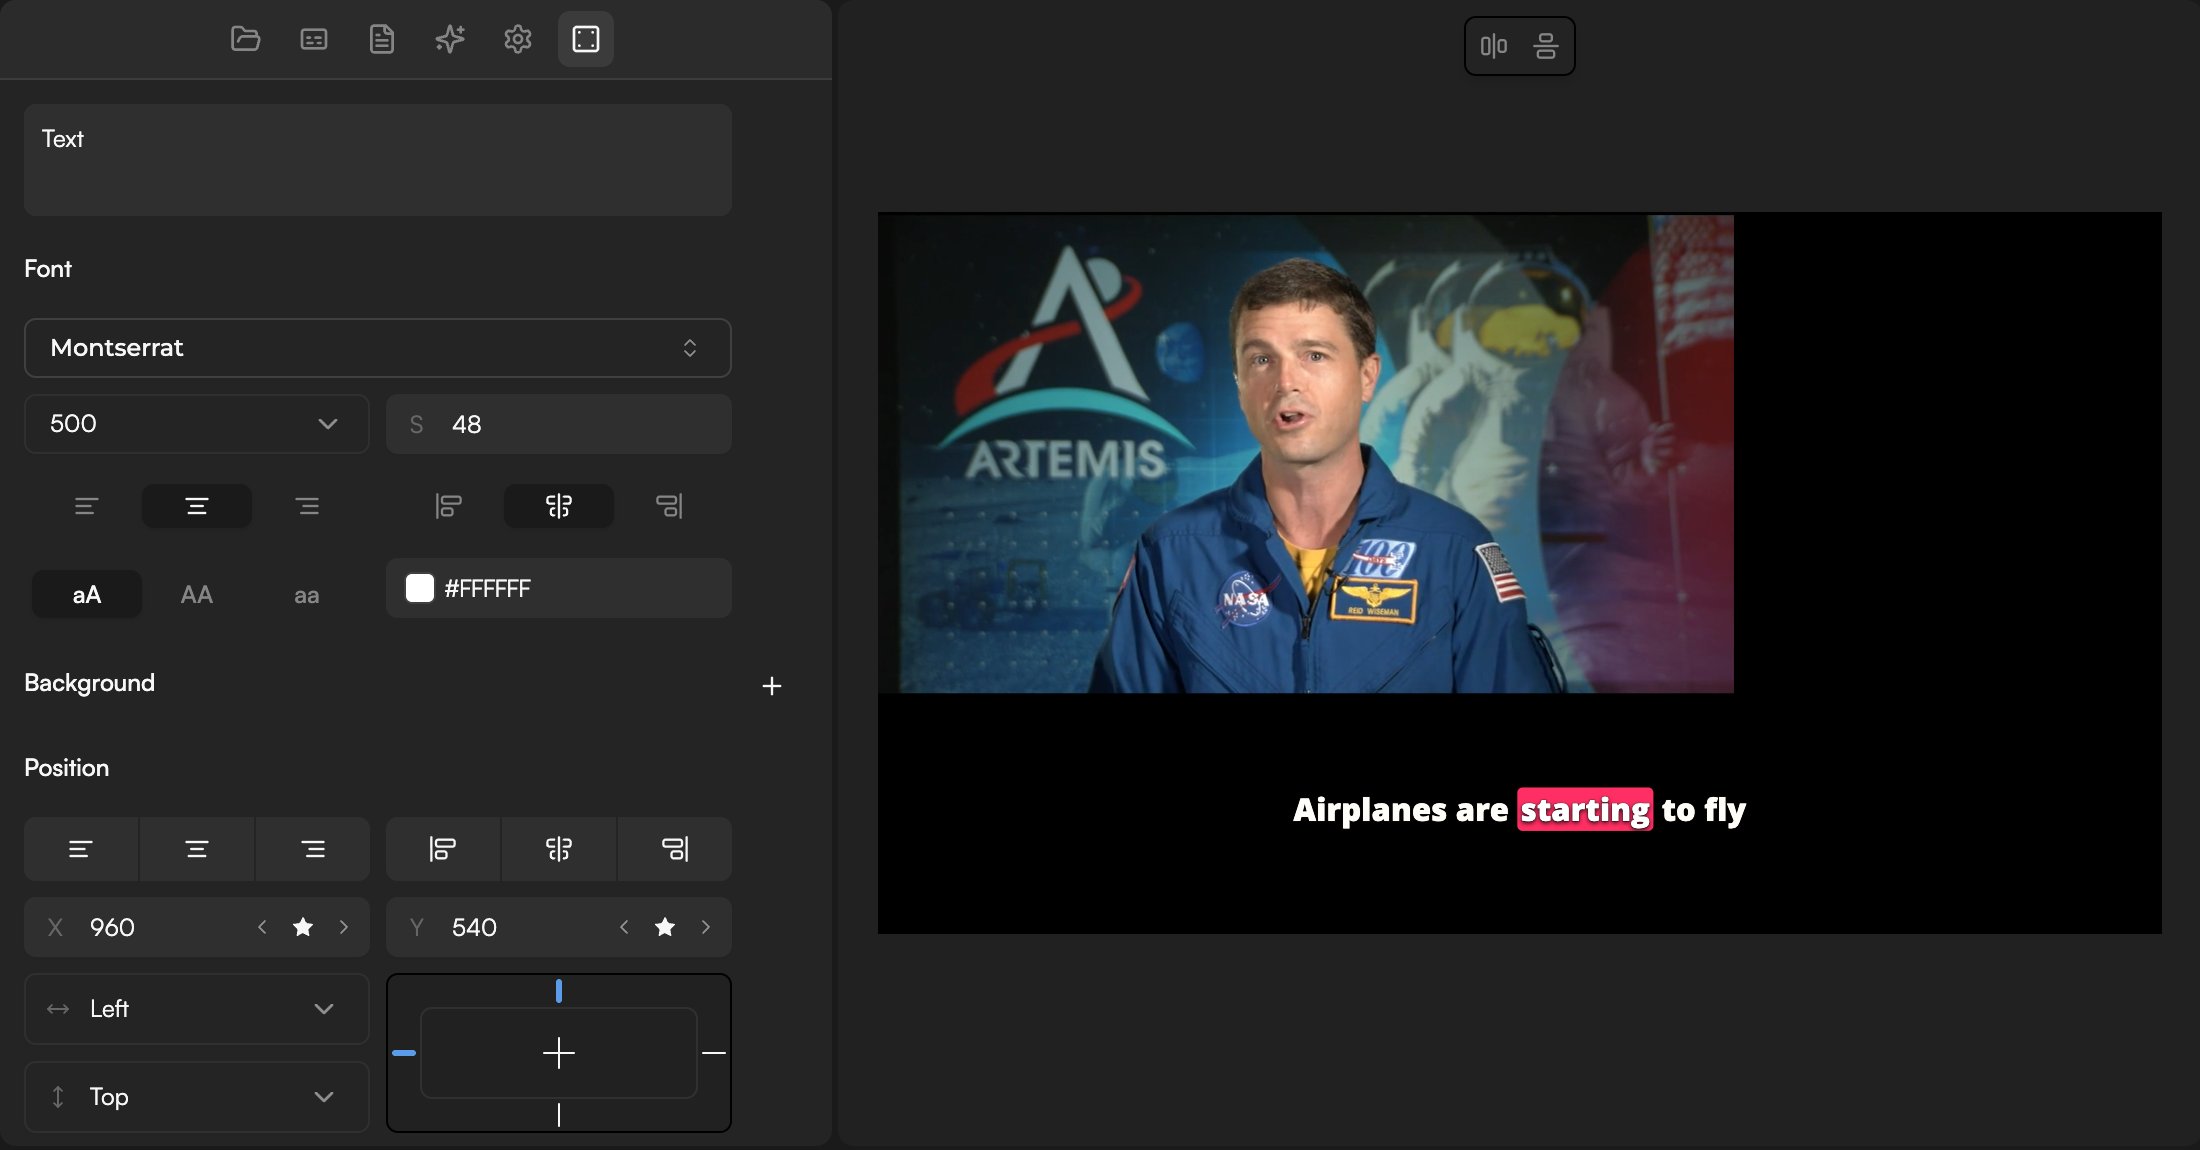
Add text
PressT, click Add text in the Timeline toolbar, or right-click an empty part of the Timeline and choose Add Text. The command palette (⌘P) lists it too.
A new text clip is placed at the playhead and lasts 5 seconds. If your footage sits on V1, the editor creates V2 for the text automatically. It reads Text in Montserrat at weight 500 and 48 px, white, centred on the canvas. Type your words into the Text field at the top of the Inspector, and trim the clip on the Timeline to change how long it stays on screen.
Text sections in the Inspector
A selected text clip shows the Text field and font controls first, then Background, Position, Appearance, Scale, Shadow, Stroke, Glow, Mask, Animate and Text FX. Position, Appearance, Mask and Animate work as for any clip; see Inspector: clip properties and Animate clips with presets and keyframes.Text and font
- Text: the words on screen.
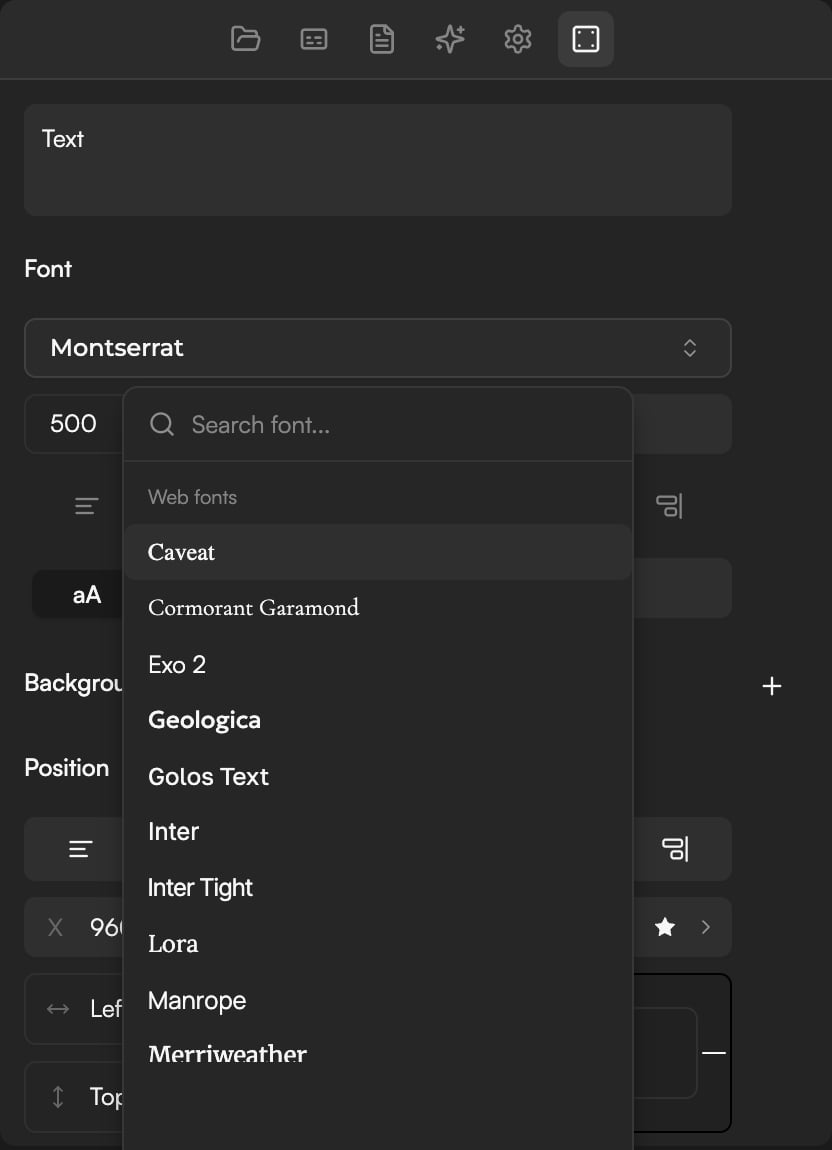
- Font: pick a family. The list is split into Web fonts (Caveat, Cormorant Garamond, Exo 2, Geologica, Golos Text, Inter, Inter Tight, Lora, Manrope, Merriweather, Montserrat, Mulish, Nunito, Onest, Open Sans, Oswald, Playfair Display, PT Sans, Roboto, Roboto Condensed, Rubik, Rubik Mono One, Russo One, Source Code Pro, Unbounded) and System fonts.
- Load system fonts under System fonts adds the fonts installed on your computer to the list; your browser may ask for permission.
- Weight (500 by default) and size (48 by default).
- Alignment buttons, and case buttons aA / AA / aa for as-typed, upper-case or lower-case text.
- A colour swatch (white,
#FFFFFF, by default).
Background
Click + in the Background header for a filled box behind the text, then set its colour, corner radius and the padding around the letters.Position and keyframes
Position has alignment buttons, X and Y fields (960 / 540 for a centred clip on a Wide canvas), Left / Top constraint pickers and an anchor grid. The ★ button next to X and Y sets a keyframe at the playhead, which is how you make a title drift or slide over time; see Animate clips with presets and keyframes.Scale
Scale stretches or squashes the text horizontally and vertically, independently of its font size.Shadow, Stroke and Glow
Each starts empty and is switched on from its header:- Shadow: a drop shadow with an offset, blur and colour.
- Stroke: an outline with a width and colour.
- Glow: a soft halo with an intensity, radius, opacity and colour.
Colours and the eyedropper
Every colour swatch opens the same picker. Type a hex value, or use the eyedropper to sample any pixel on the screen, for example a brand colour from your footage.Add shapes
Click Add shape in the toolbar and pick Rectangle, Ellipse, Pen, Polygon, Star or Line. The empty-area right-click menu has Add Shape as well. The shape lands at the playhead on a video track. Pen is different: instead of dropping a ready shape, it lets you draw your own path on Preview.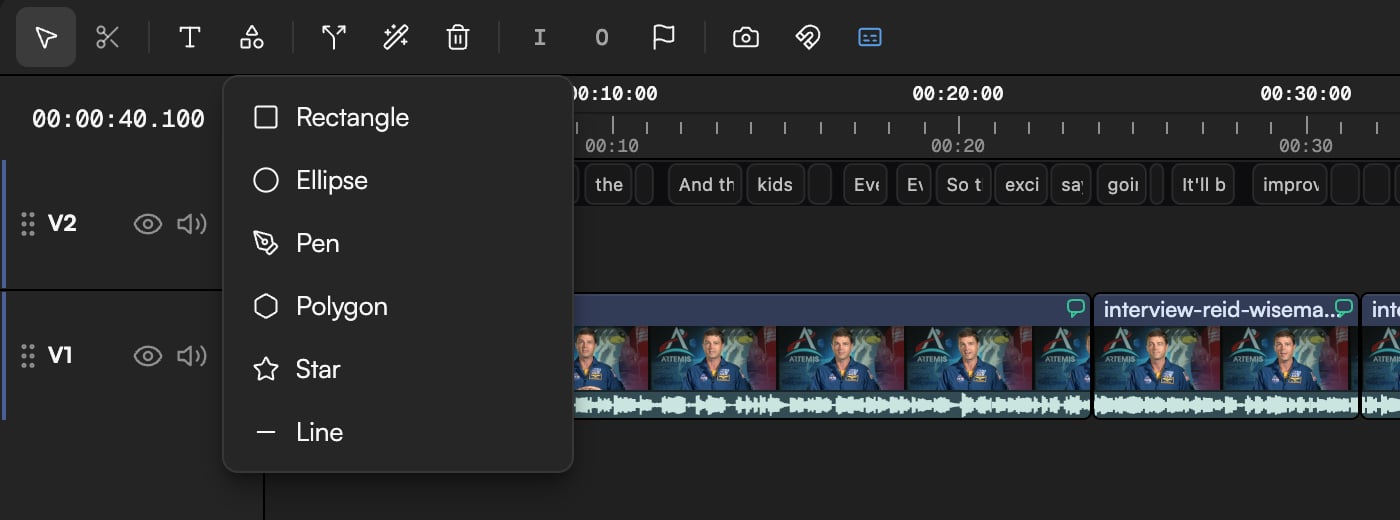
Shape sections in the Inspector
A shape shows the sections every clip has (Position, Layout, Anchor, Appearance, Mask, Animate) plus Fill, Stroke, Shadow and Effects.- A polygon has a number of sides; a star has a number of points and an inner radius.
- Fill: the fill colour.
- Stroke, Shadow and Effects work as described above and in Inspector: clip properties.
Text FX
Text FX turns a plain text clip into an animated reveal:1
Pick a mode
By word, By letter or Scramble (letters cycle through random characters before settling).
2
Set the timing
Reveal is how long the animation takes, in seconds (0.1 to 5 s). Easing starts at Reveal (default); open the dropdown for other curves.
3
Convert
Click Convert to text reveal. The note under the button explains what happens: Converts this text clip into an animated text-reveal motion graphic. Reversible from the new clip; existing keyframes are not carried over.
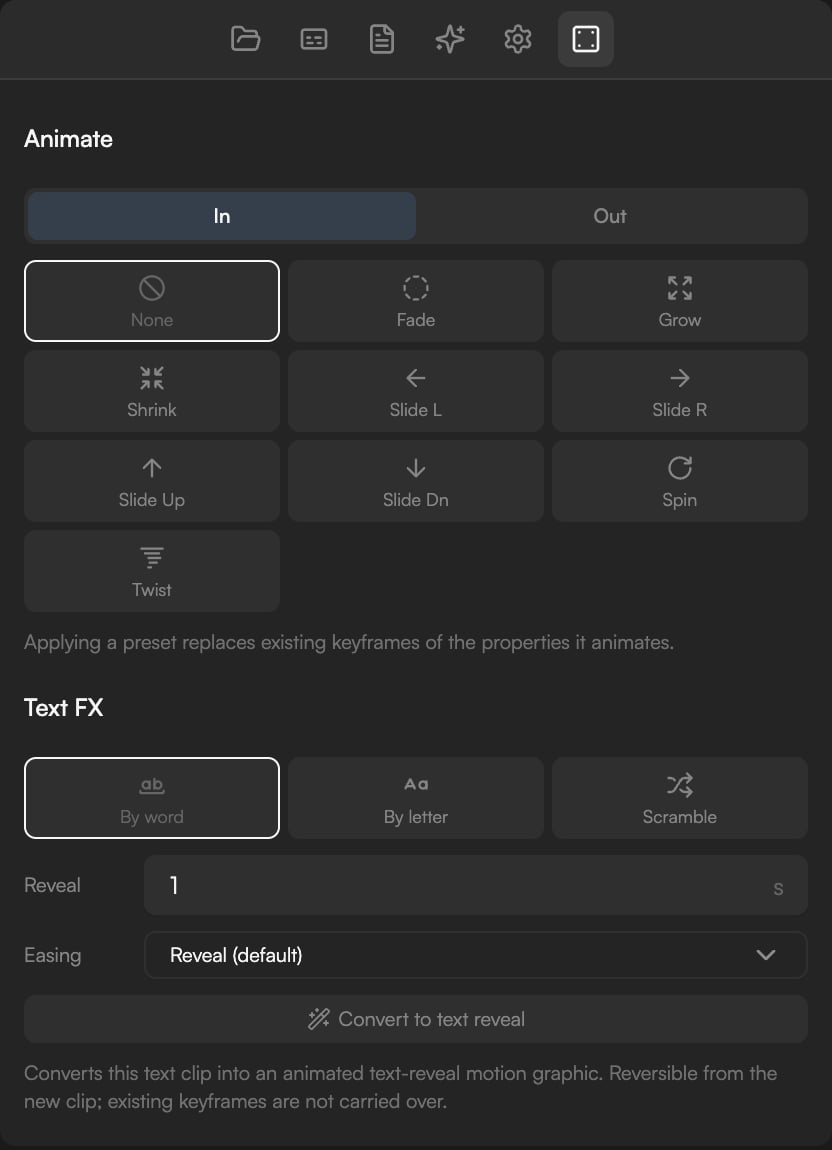
Text FX is the quick way to get animated titles. Preset entrances such as Fade or Slide in the Animate section work on the whole text box instead; see Animate clips with presets and keyframes.