

1
Sign in
Open app.goframe.dev and sign in with Continue with Google, or with your email: enter it, click Send code, type the 6-digit code from your inbox and click Sign in. There is no separate sign-up step; if you don’t have an account yet, one is created for you.GoFrame Editor is in closed beta. If you see the beta wall, enter your invite code (it looks like 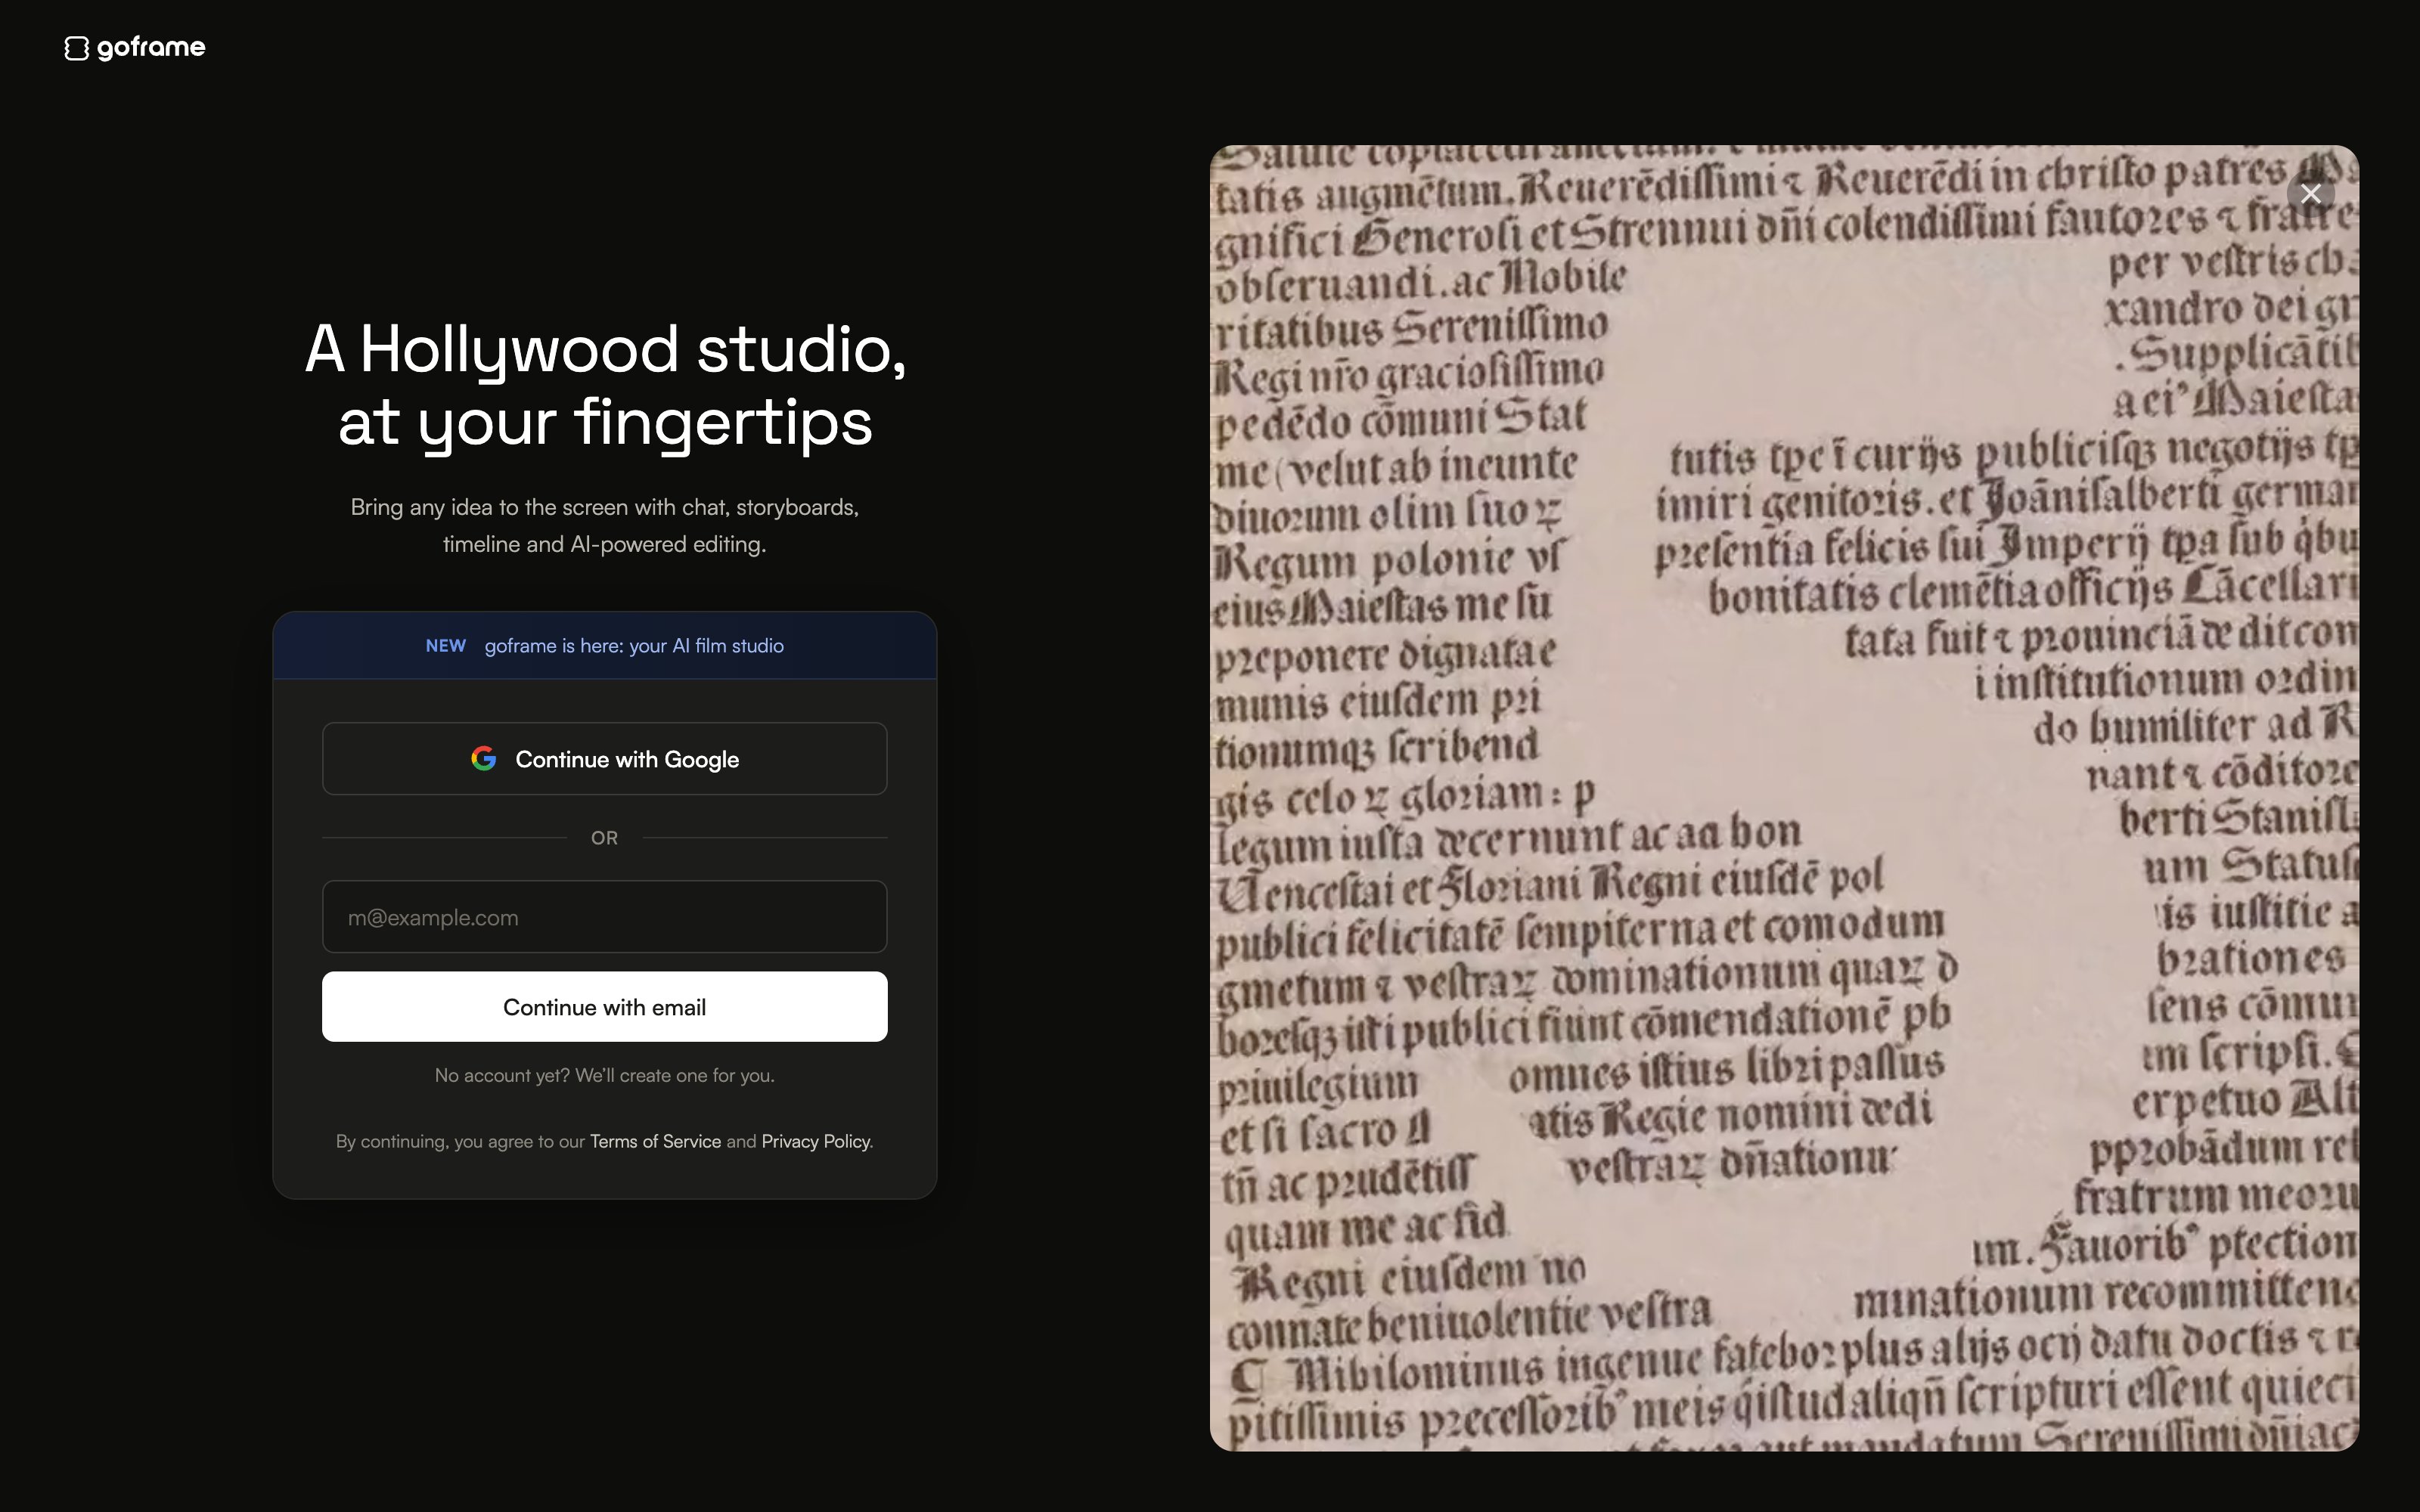
GF-XXXX-XXXX) and click Activate, or click Join the waitlist. See Sign in and beta access.2
Describe your video on Home
Home greets you with one prompt box, Describe the video you want to create…. Type what you want in plain language, for example “Tighten this interview, remove the filler words and add karaoke captions”, then press 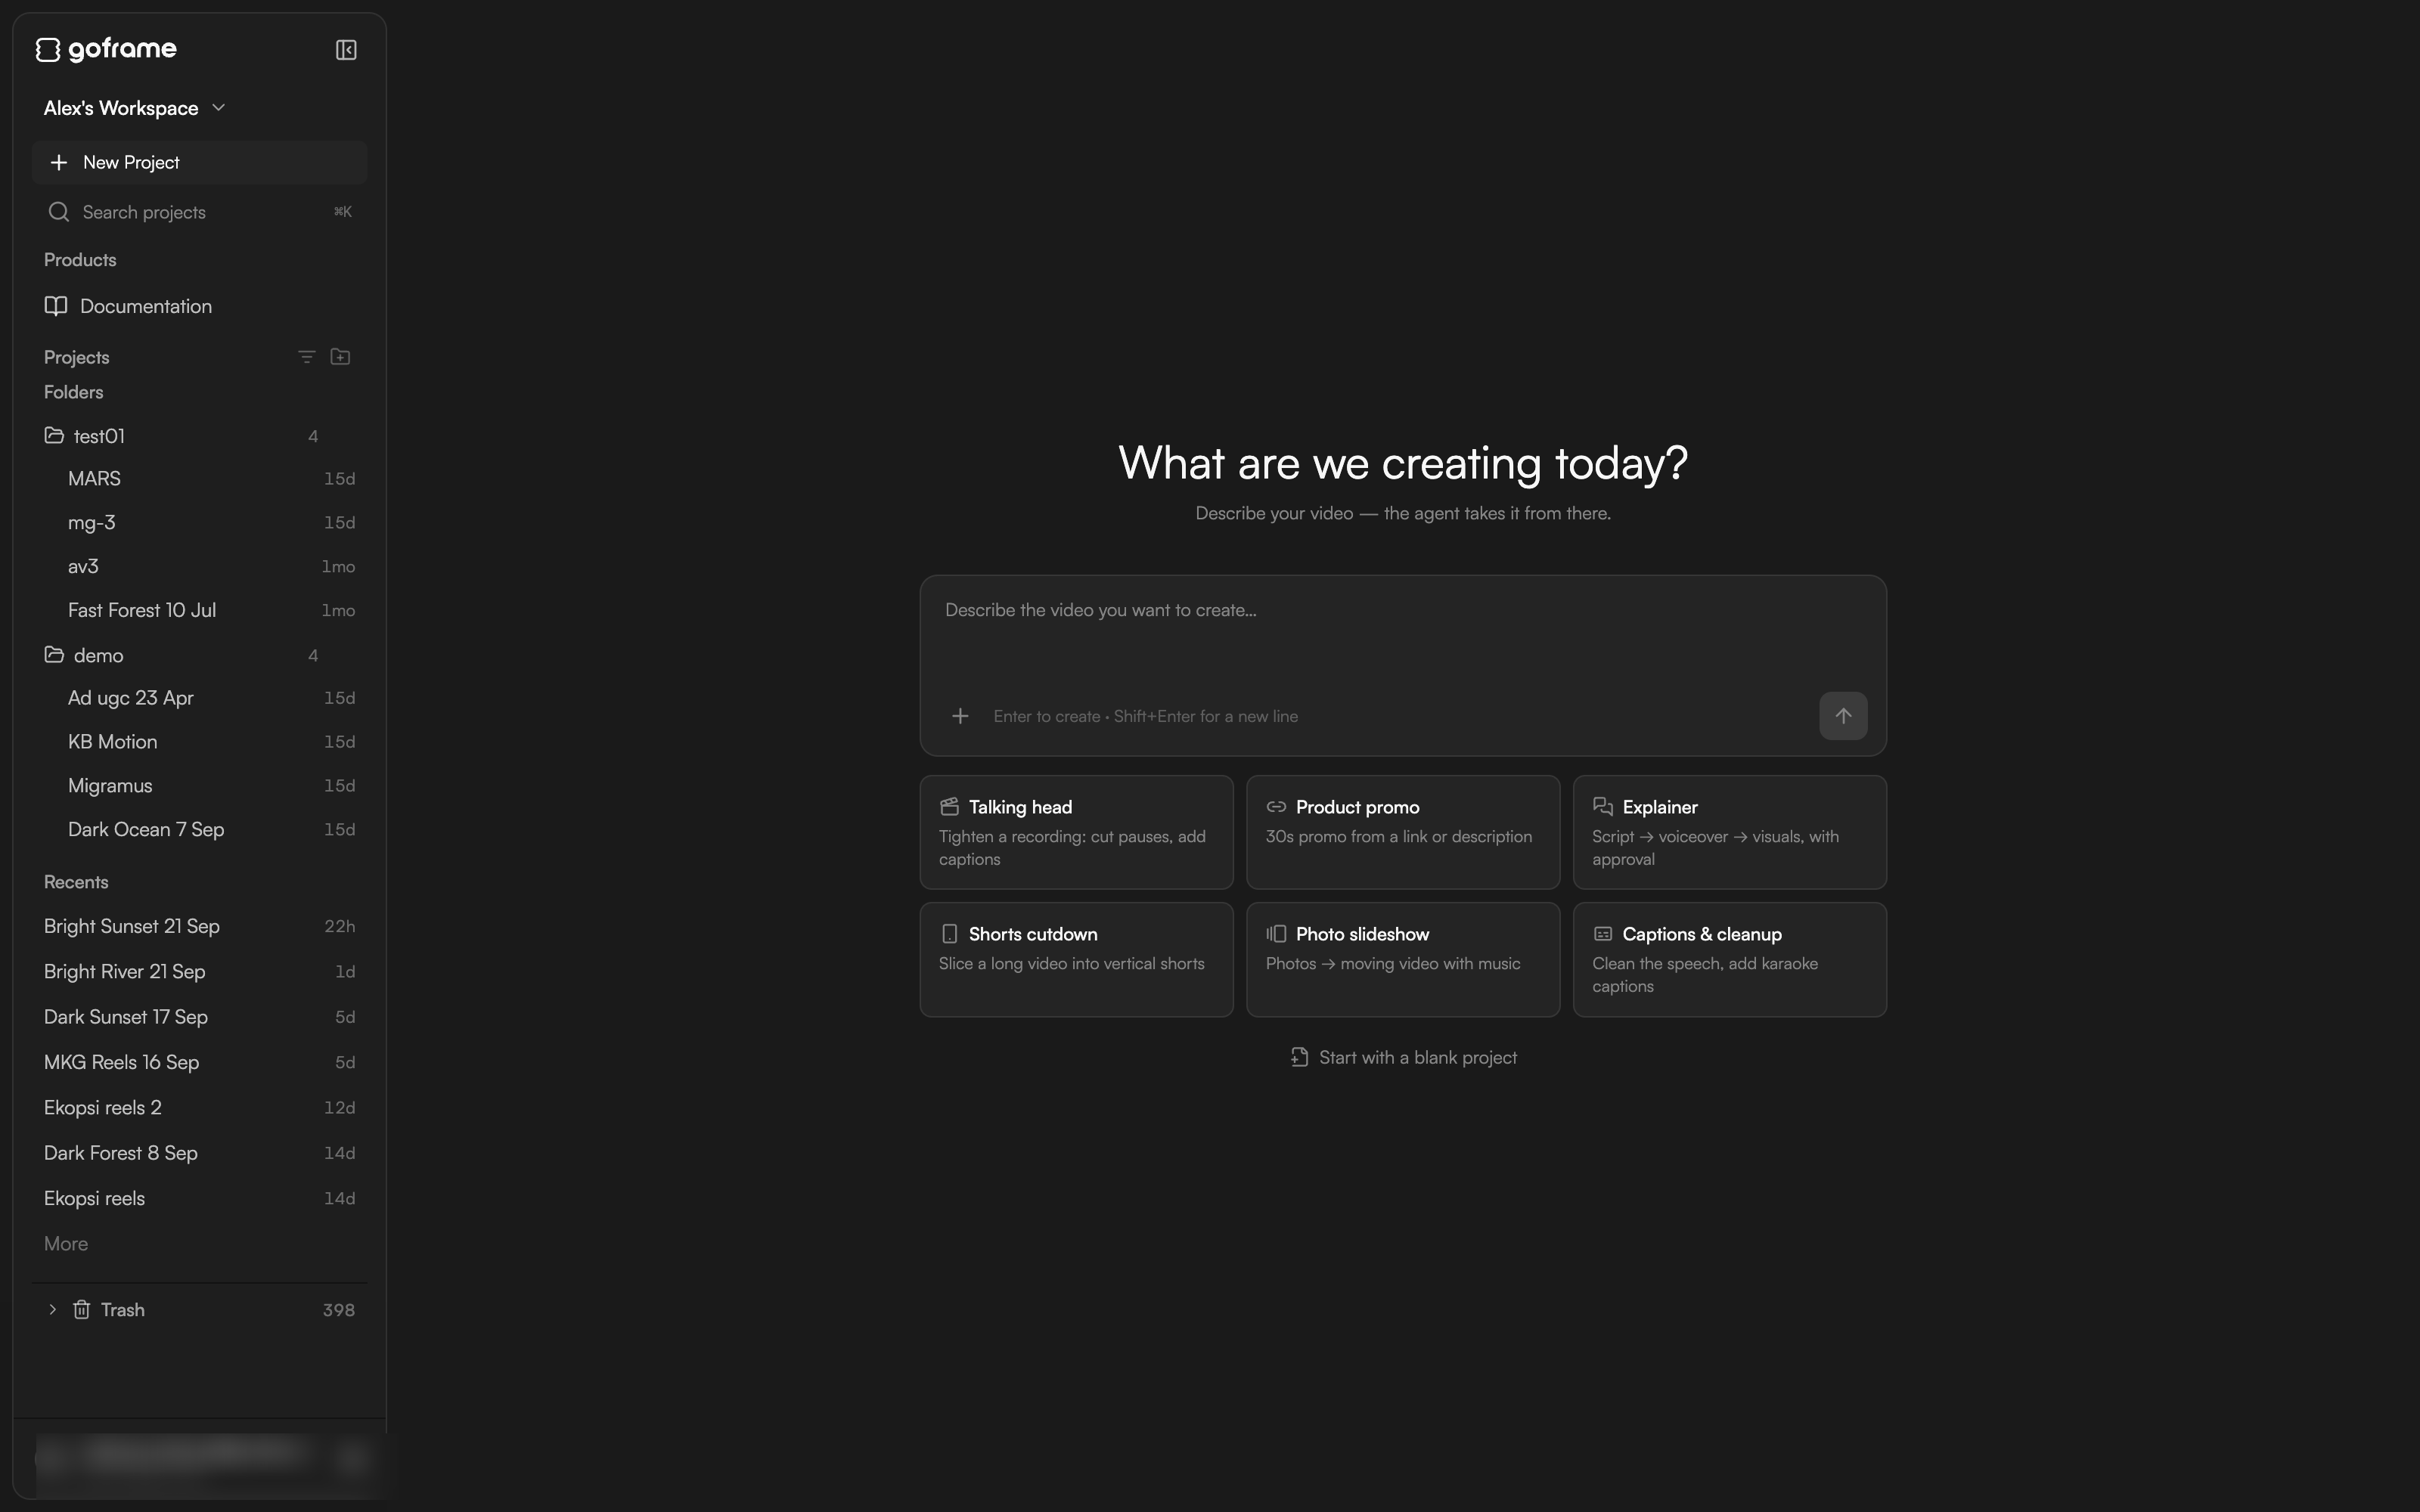
Enter (Shift+Enter for a new line) or click Create project.Three other ways to start:- Attach starter files (script, brief, media) to hand the agent material before the project opens.
- Pick one of the six template cards: Talking head, Product promo, Explainer, Shorts cutdown, Photo slideshow or Captions & cleanup.
- Start with a blank project if you’d rather import media and edit by hand.
3
Meet the agent in Agent layout
A new project opens in Agent layout: the chat sits in the centre, a narrow rail on the left holds the panel toggle, search and your avatar, and Preview and Media appear in a dock on the right once the agent produces results. The Timeline stays hidden until you need it. The agent opens with a welcome message and suggestion chips: Create promo from URL, Generate motion graphics and Create explainer video on an empty project, then Auto-edit this video, Remove filler words, Extract highlights and Add captions once you have media.The composer takes plain language plus two helpers: type 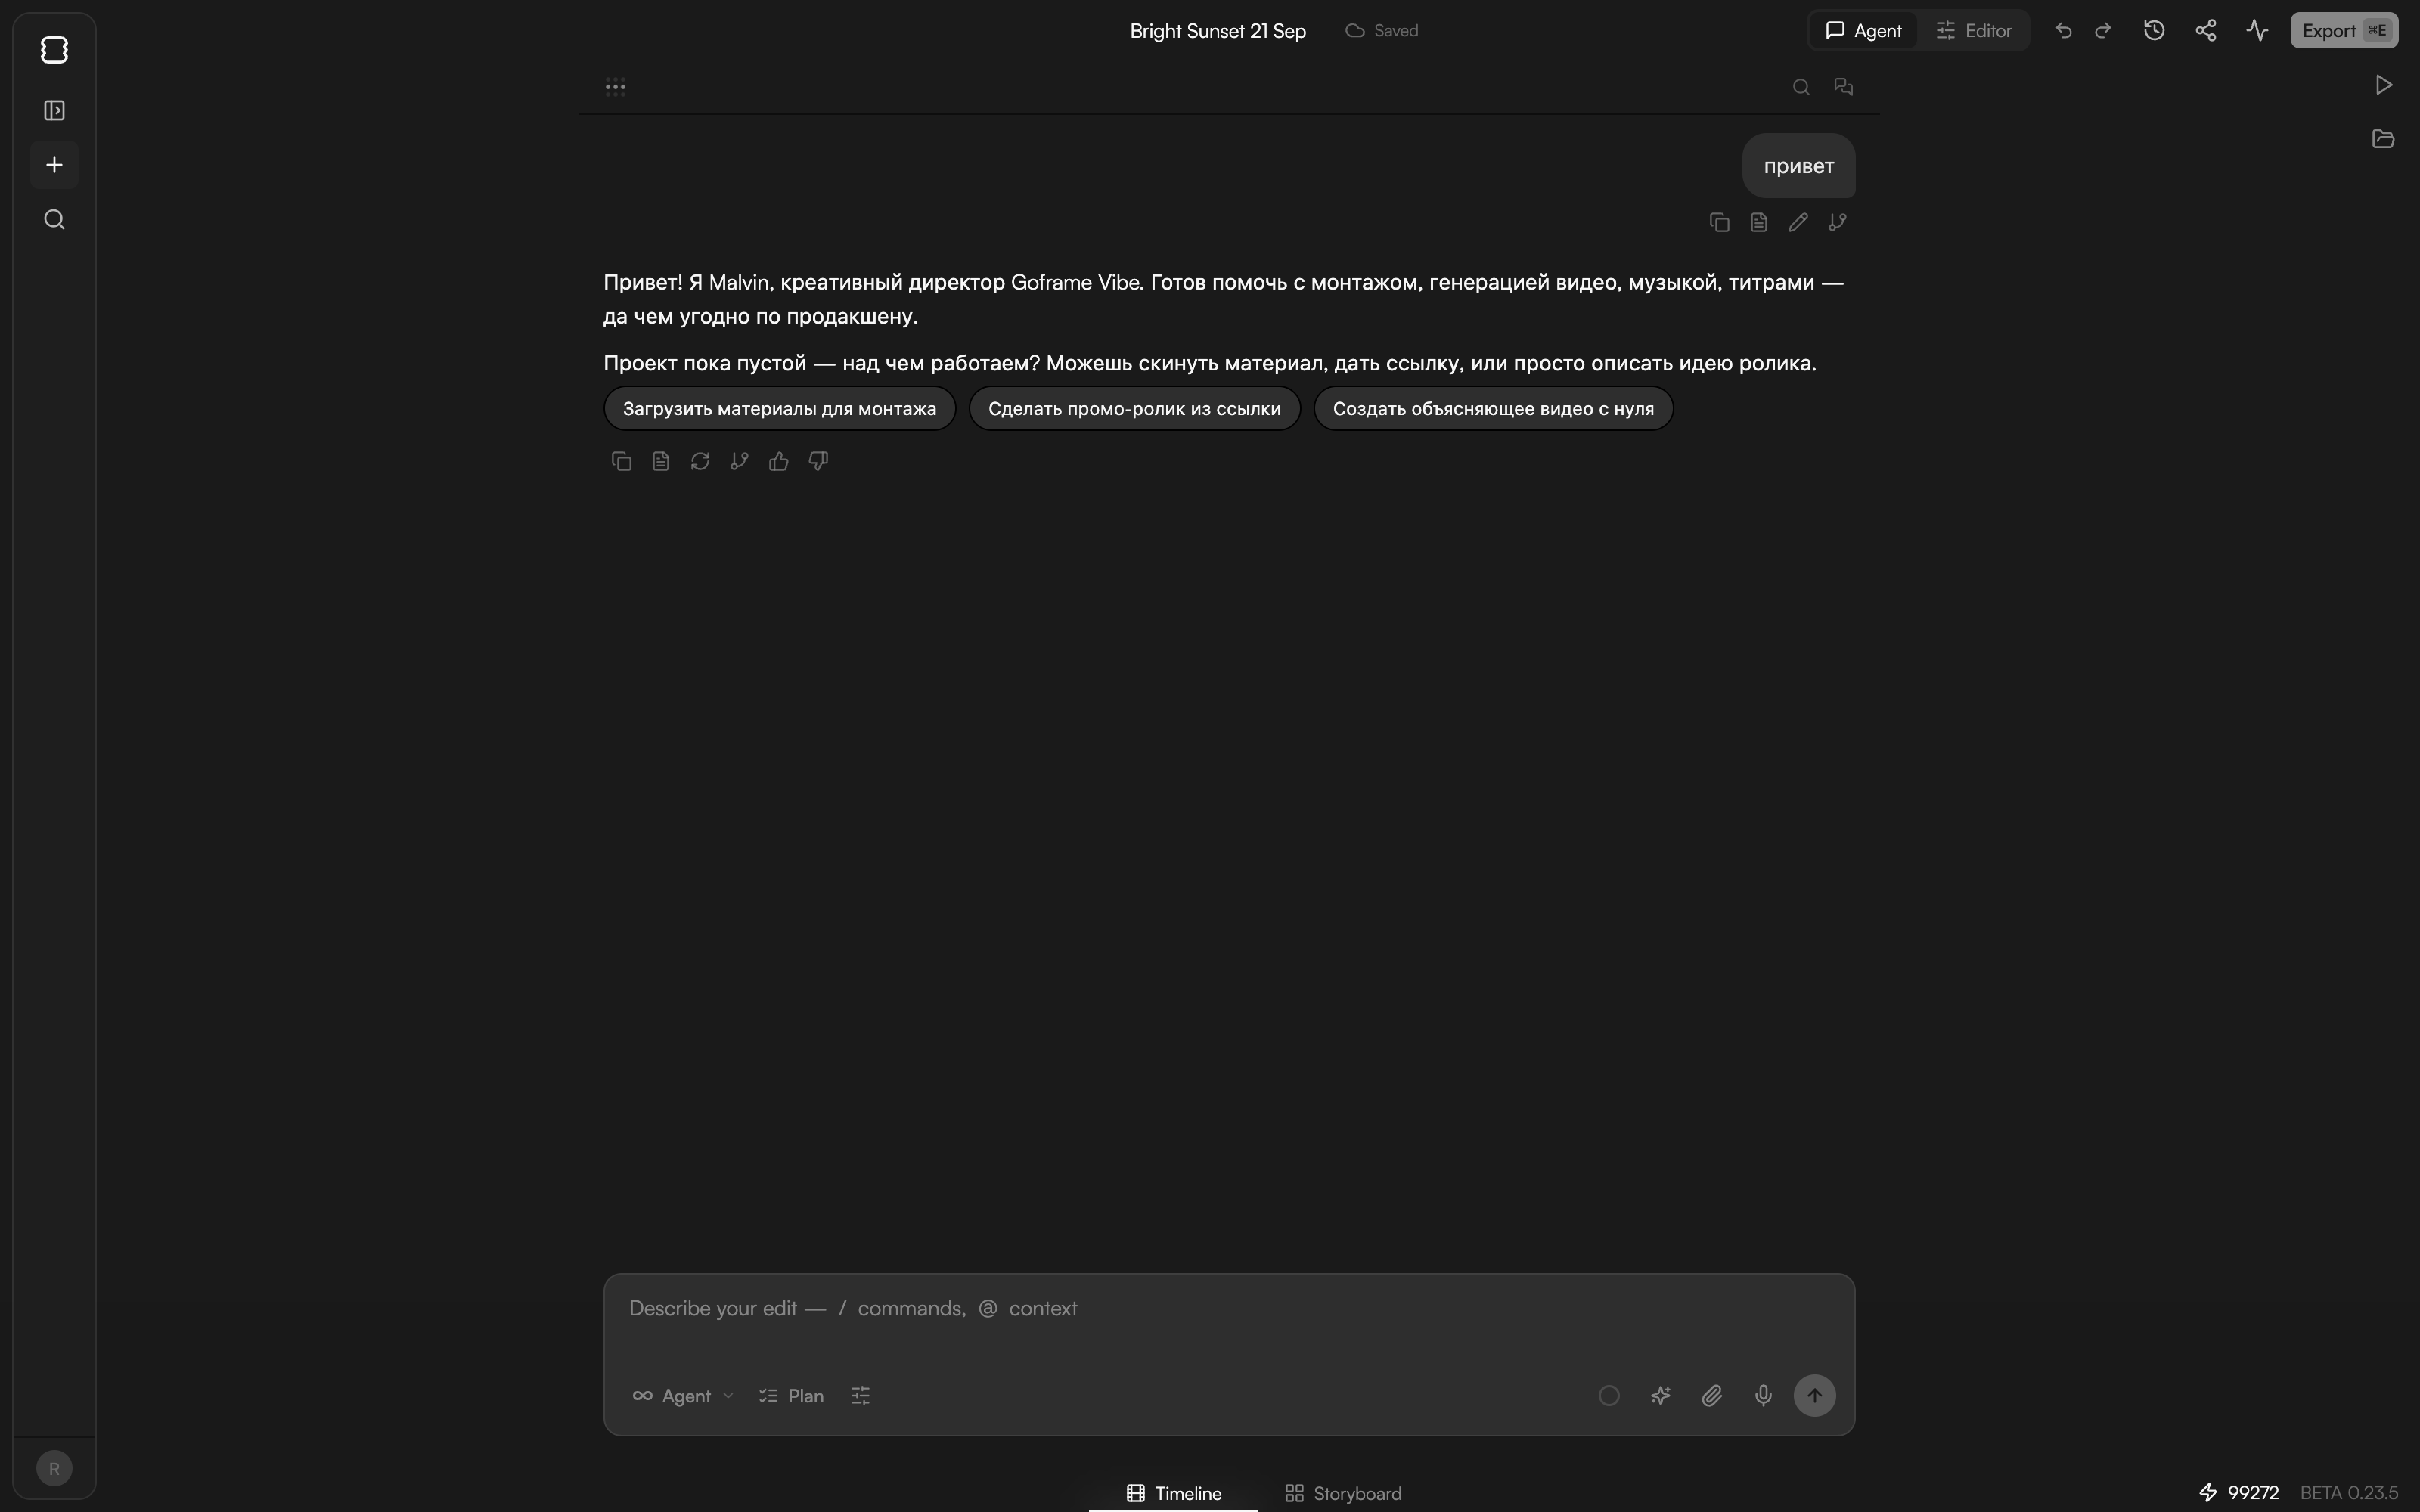
/ for commands and skills, and @ to reference an asset, a clip or a passage of the transcript. See Meet GoFrame Editor Agent and Write prompts, references and commands.4
Add your media
Open the Media tab in the right dock (or the Media pool panel in Editor layout) and click Import files (or Import in an empty pool), or drag files in from your desktop. GoFrame Editor accepts common video (mp4, mov, webm, mkv, avi, qt), audio (mp3, wav, m4a, aac) and image (jpg, png, gif, webp) files up to 50 GB.Imported files stay local to this browser until Cloud Sync (in the asset’s right-click menu) uploads them. Turn on Auto cloud sync in Library settings to sync every new file automatically. See Import media.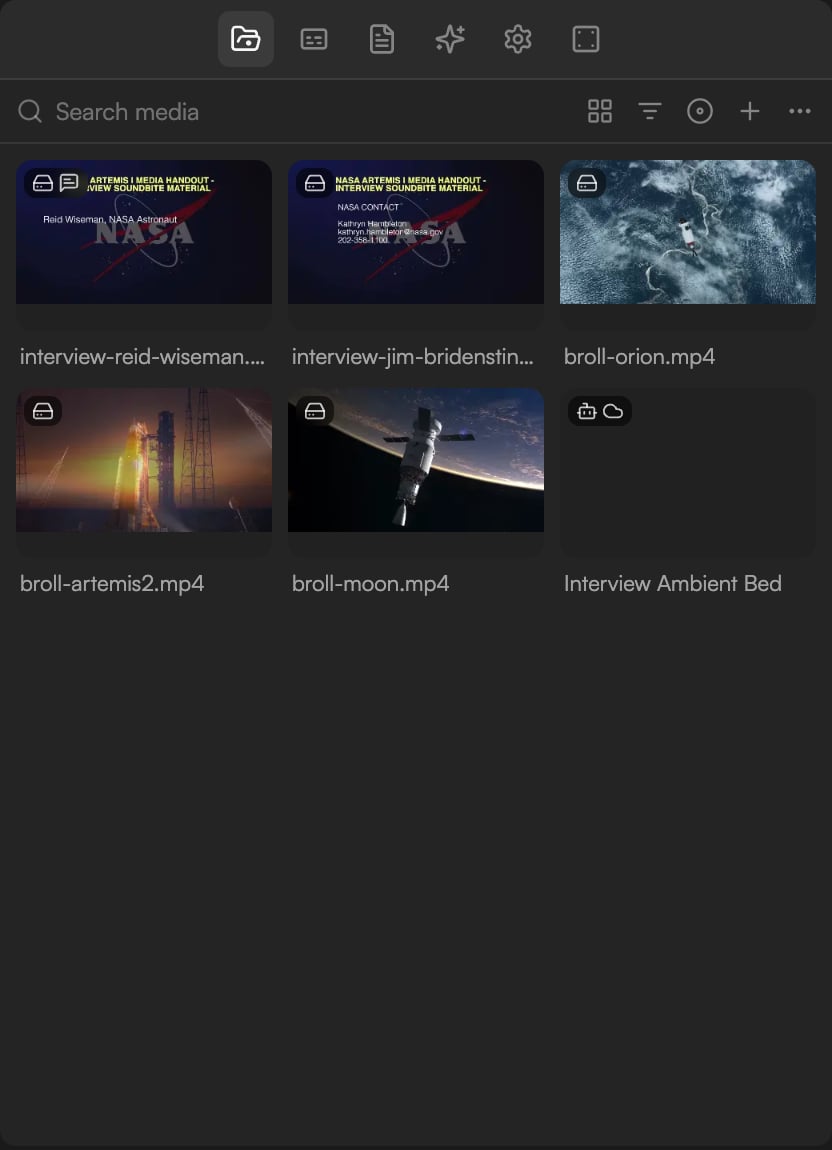
5
Let the agent build the edit
Ask for what you want: “Cut the pauses, keep the best take of each answer and add a title.” The chat shows Agent is working with a status line and esc to cancel; operations and tasks tick off as it goes, and the run ends with Agent run finished.For larger changes the agent shows an edit proposal first: a Timeline impact headline, then one entry per edit with Range, Change, Risk and Why rows. Click Apply plan (or press 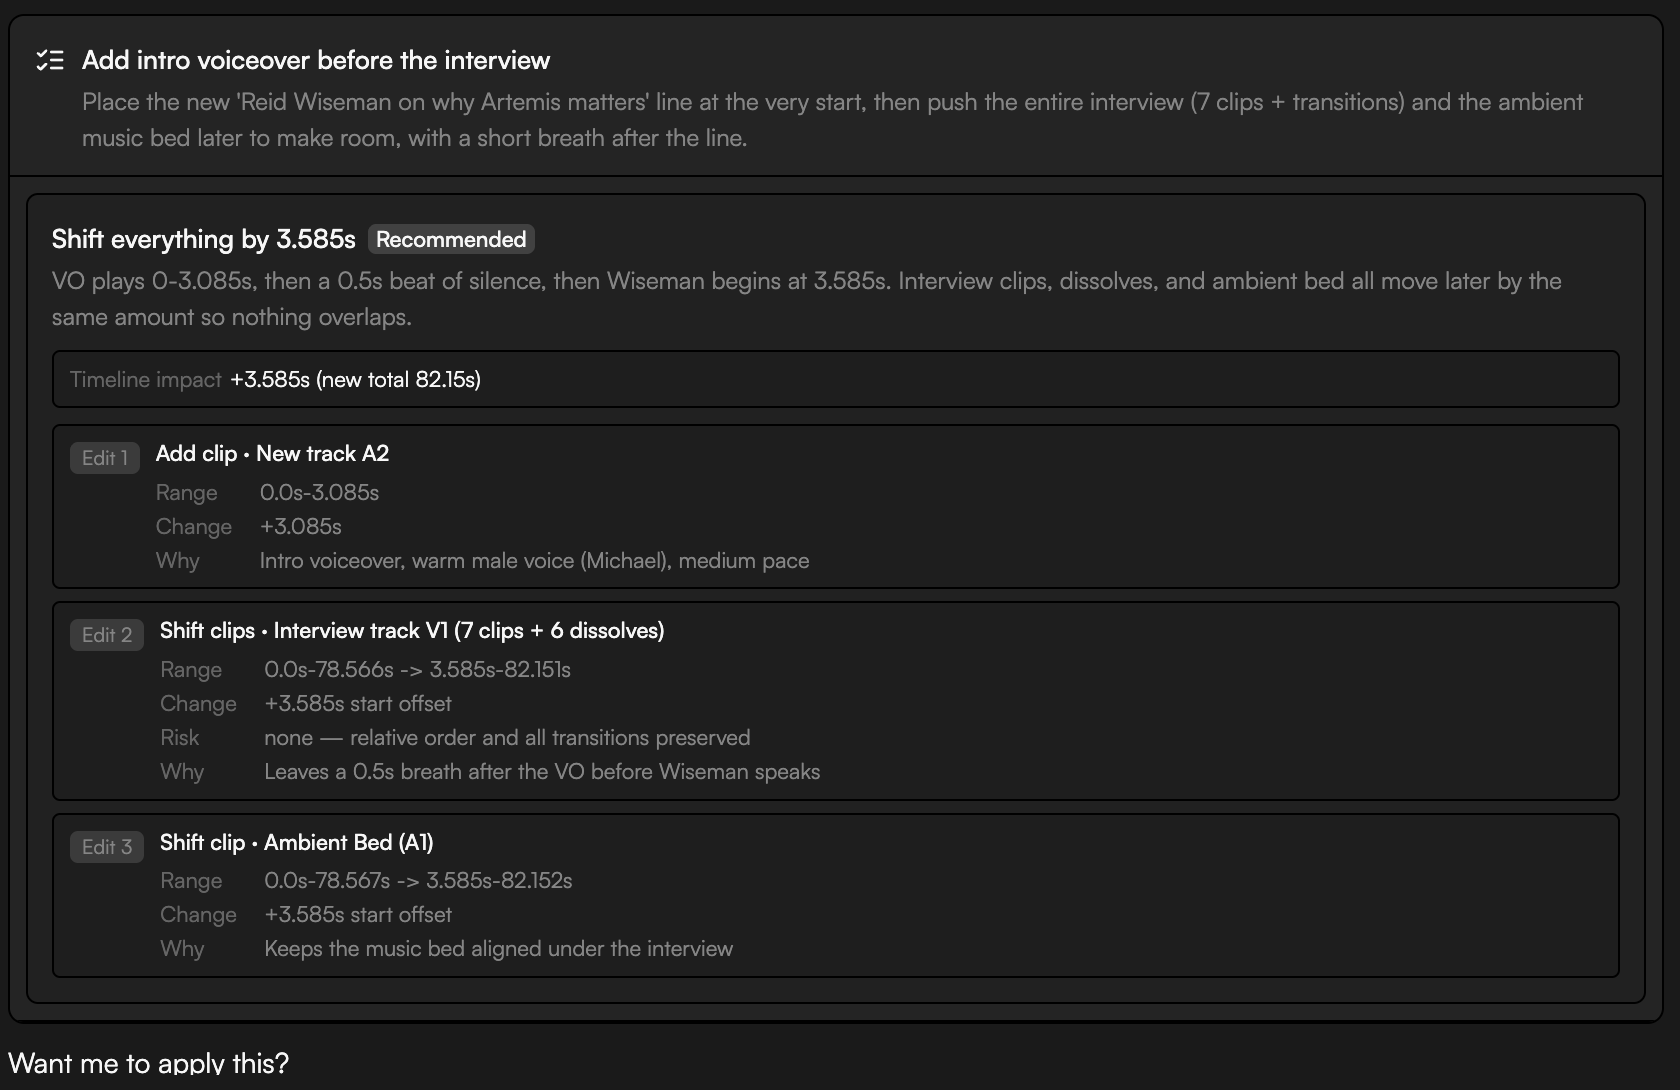
Enter), or Revise to send it back with notes. Before spending credits the agent says what a step costs and may ask you to choose, for example which model to use. After every applied edit a Timeline changes row lists what was added, removed, moved or trimmed. See Review proposals and approve actions.6
Review the result in Preview
Play the cut in the Preview tab.
Space plays and pauses, ← and → step one frame, ↓ and ↑ step one second. If something is off, say so in chat (“the intro is too long, cut it to five seconds”) or type /undo to roll back the last agent edit.7
Switch to Editor layout to fine-tune
Press 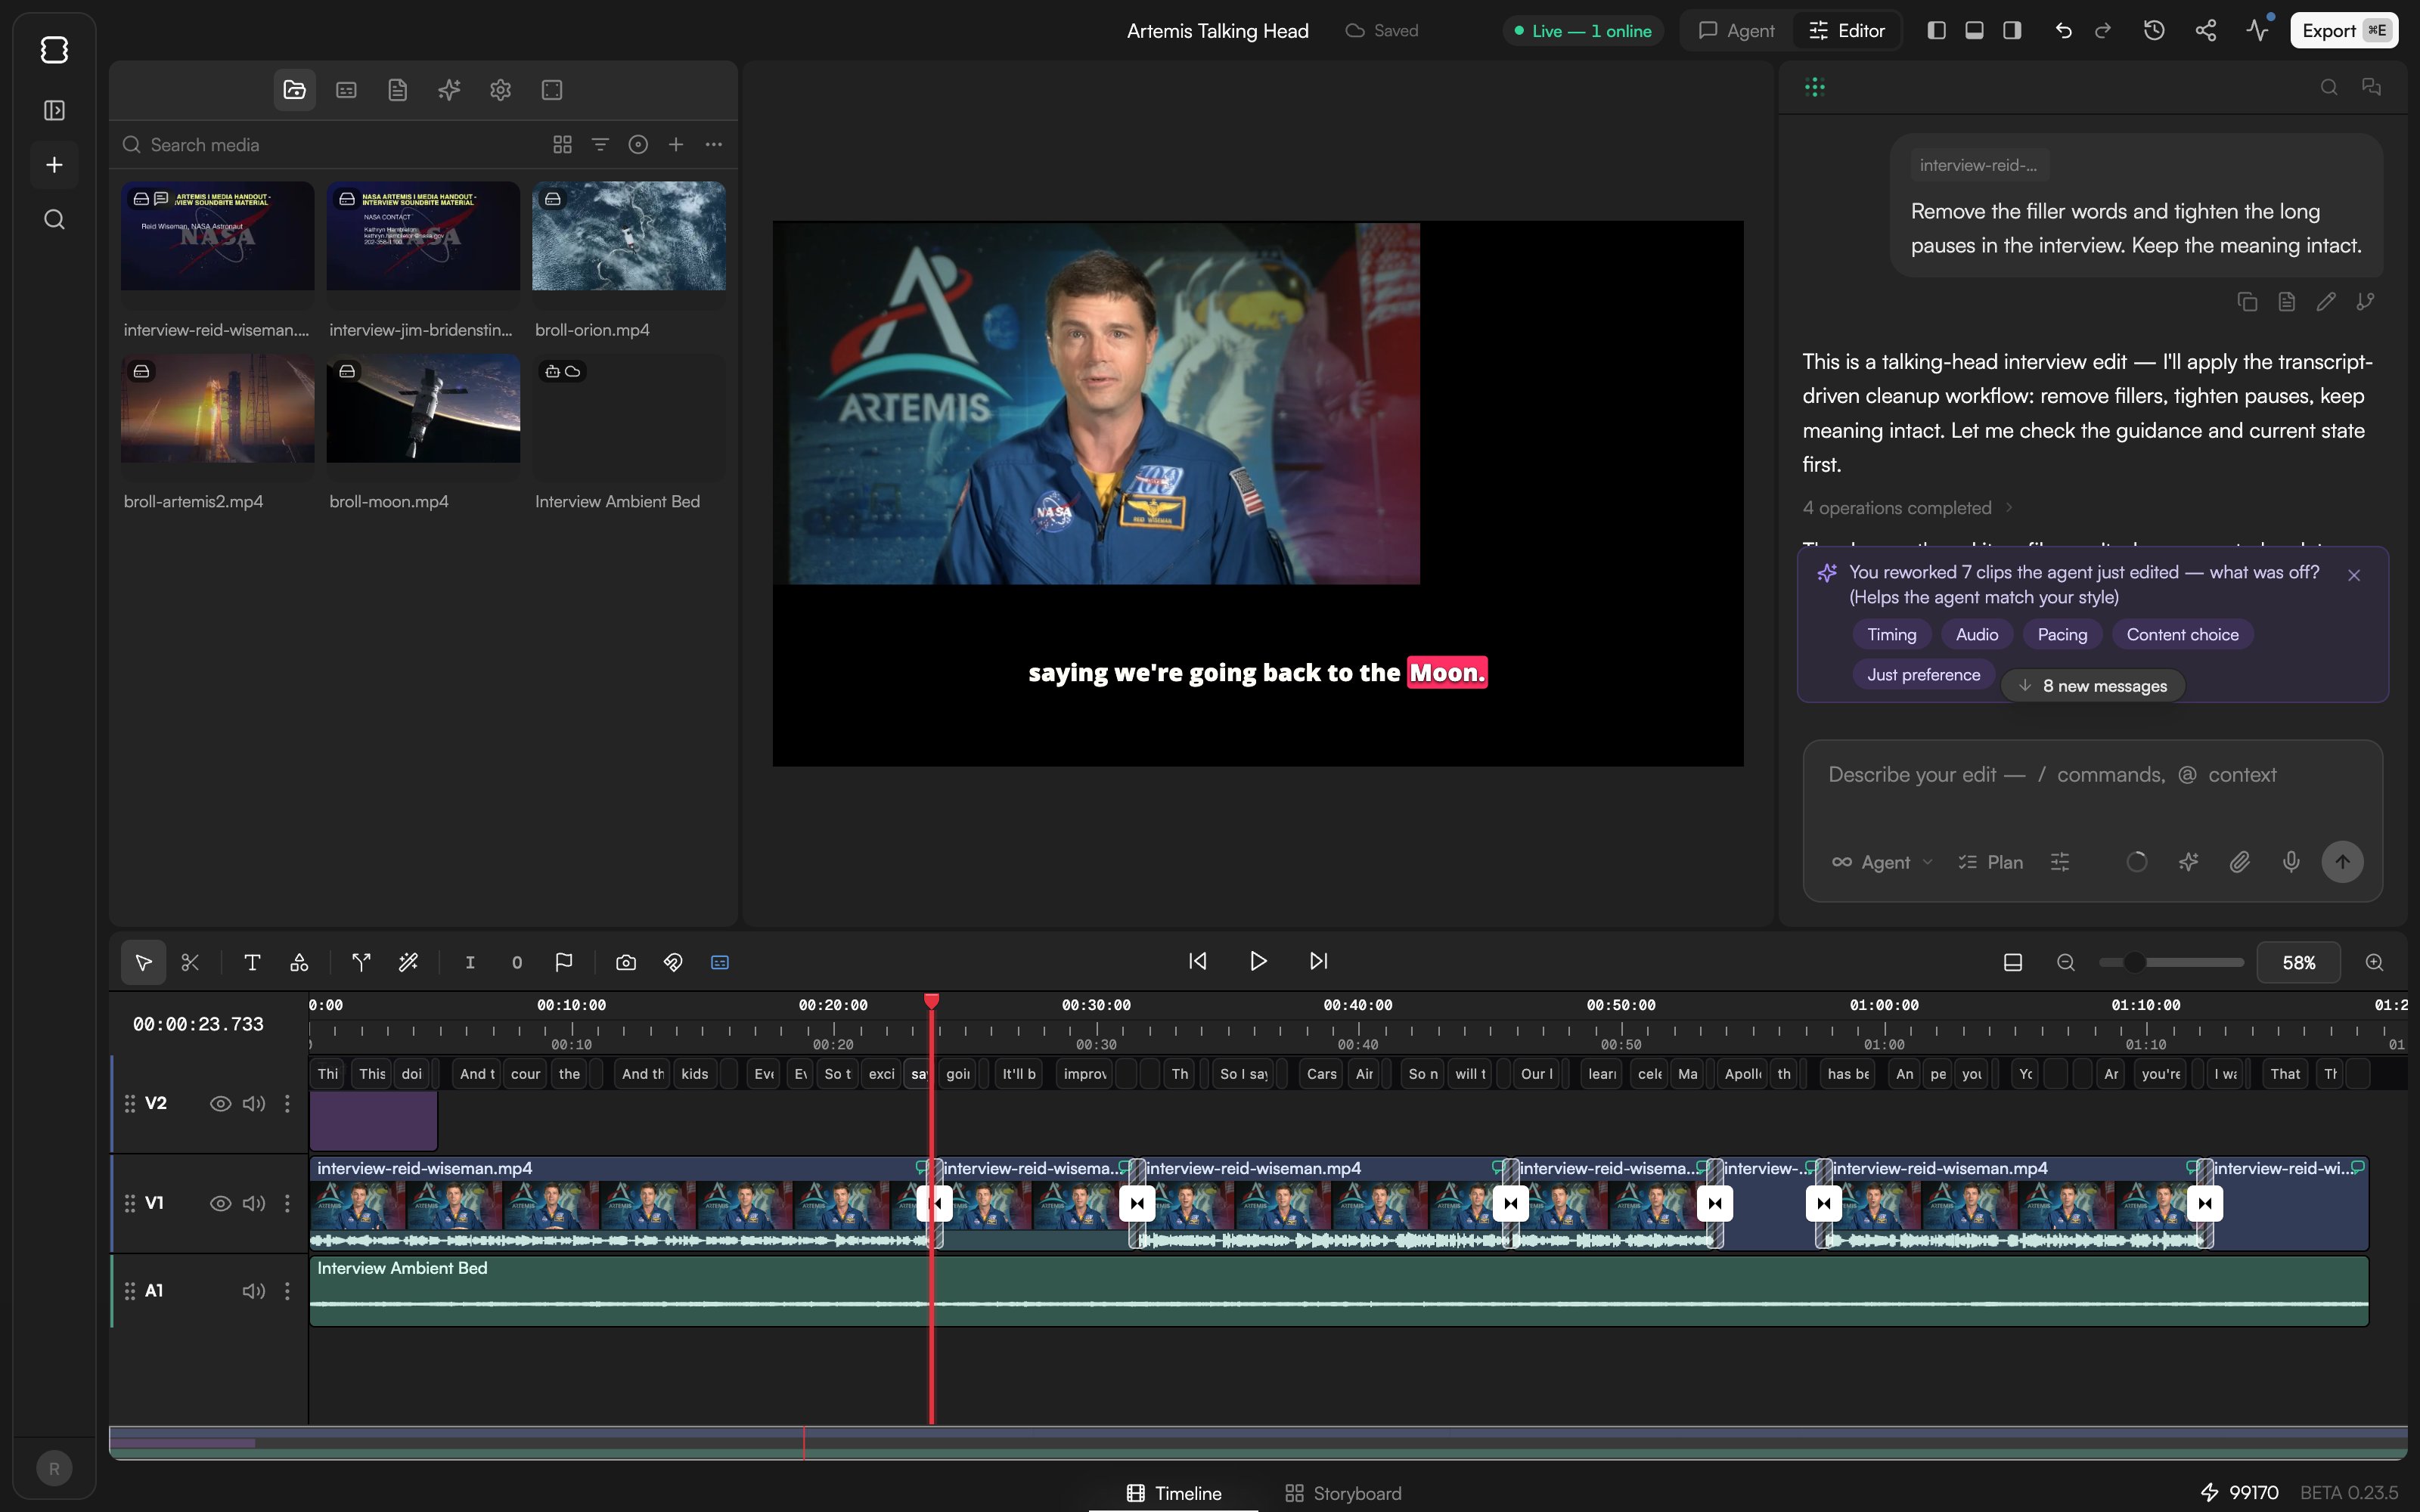
⌘. (Ctrl on Windows) or use the layout switcher in the top bar to open Editor layout: panels on the left (Media pool, Captions, Transcript, Toolbox & VFX, Settings, Inspector), Preview in the centre, chat on the right and the Timeline along the bottom.Here you trim and split clips (⇧B splits at the playhead), drag transitions from Toolbox & VFX onto a cut, and adjust position, opacity, volume and effects in the Inspector. ⌘Z undoes up to 50 steps. See Editor layout, Timeline basics and Edit clips.8
Add captions
Captions are built from the transcript, so transcribe your footage first: open the Transcript panel and click Transcribe next to the file (about 1 credit per minute), or ask the agent to add captions and it handles both steps.Then open the Captions panel, turn on Show captions and pick a preset. Presets come in four groups: Clean, Karaoke (word-by-word highlight), Editorial and Loud. Fine-tune the font, size, position and pacing below the preset grid. See Captions and Transcribe media.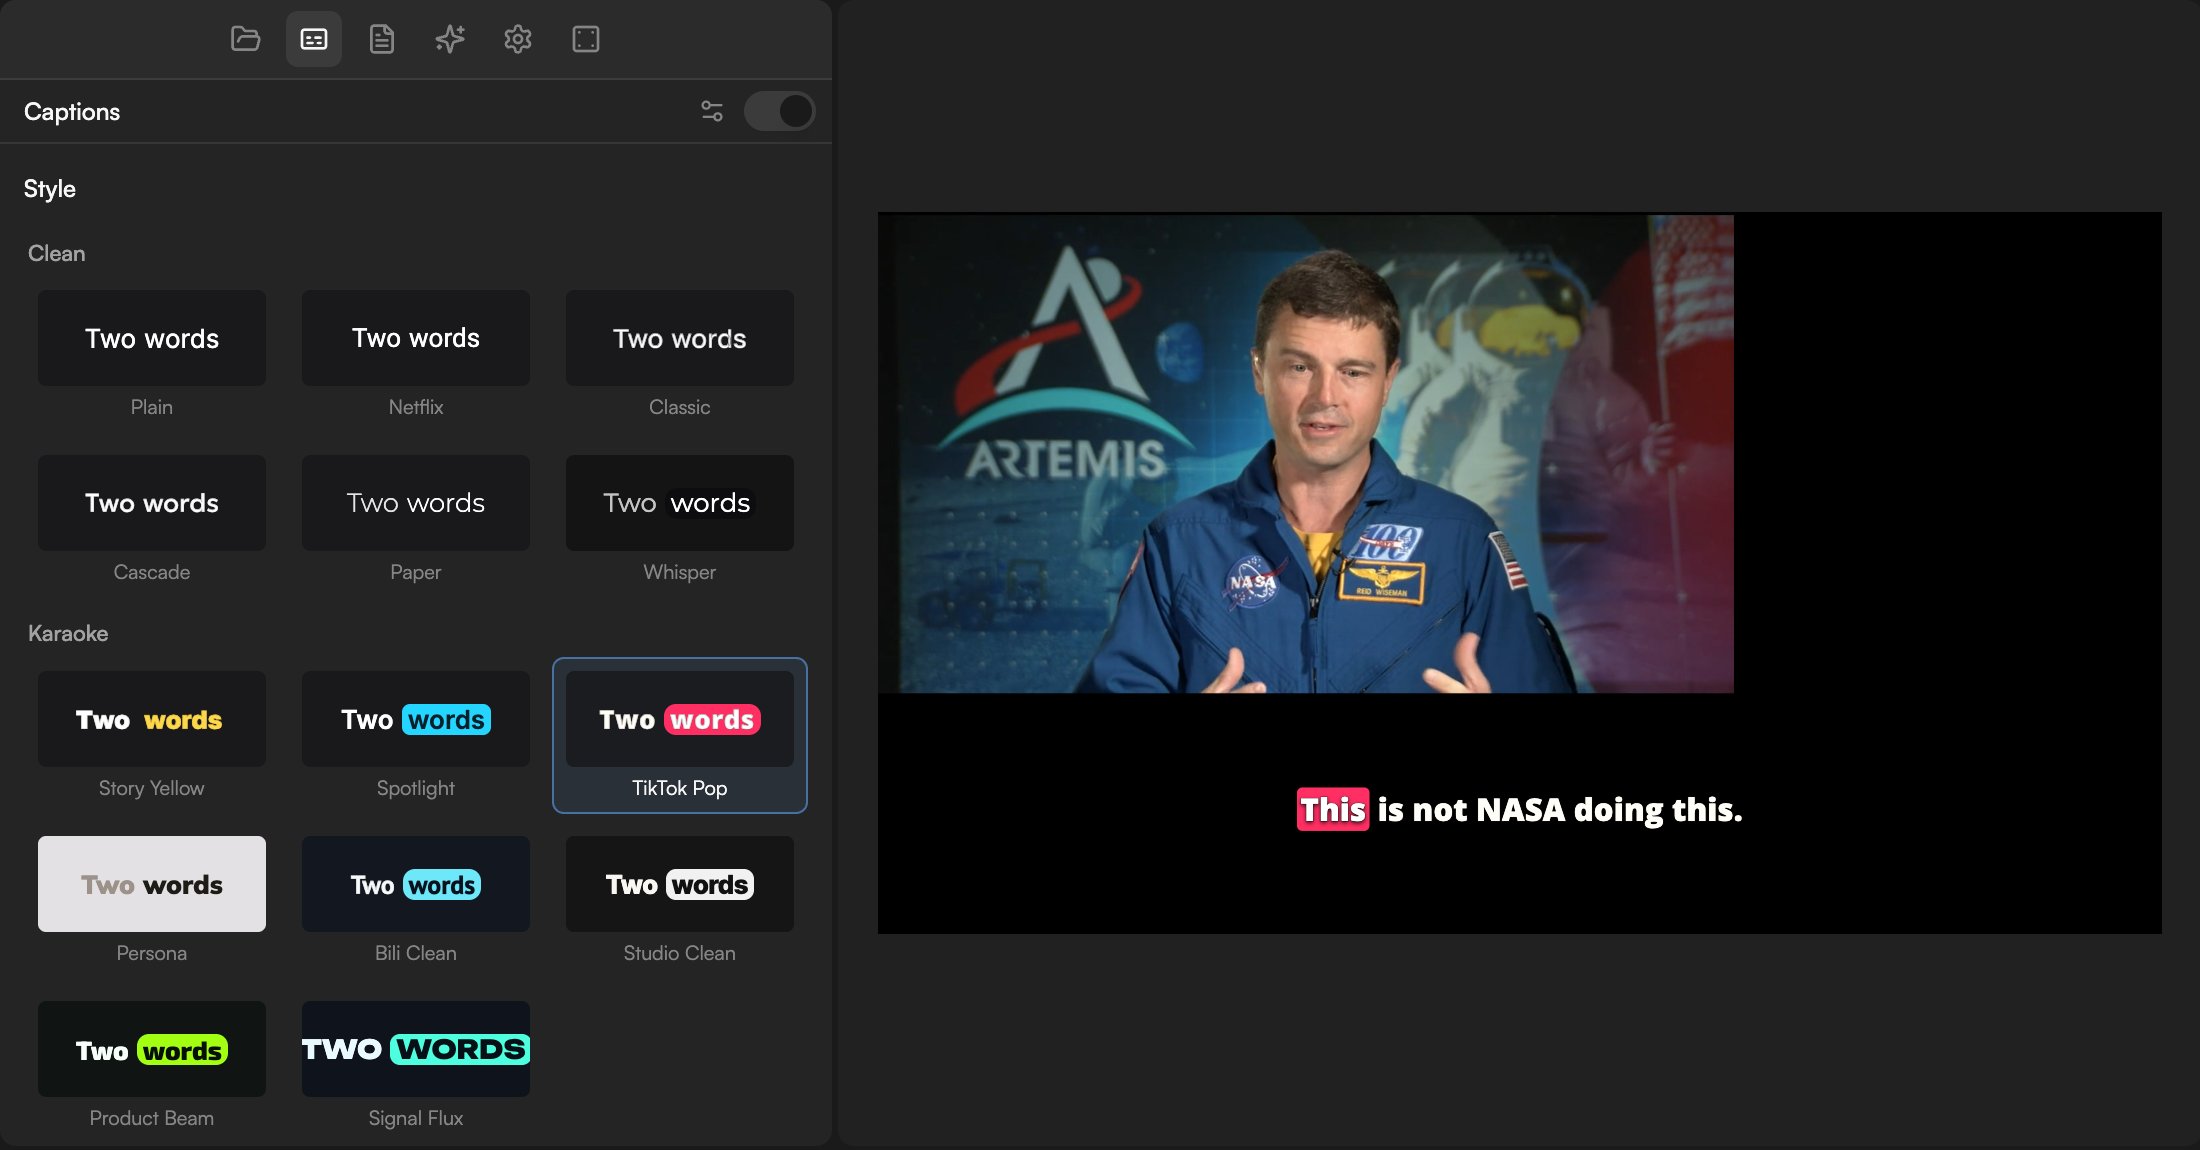
9
Export
Click Export in the top bar or press 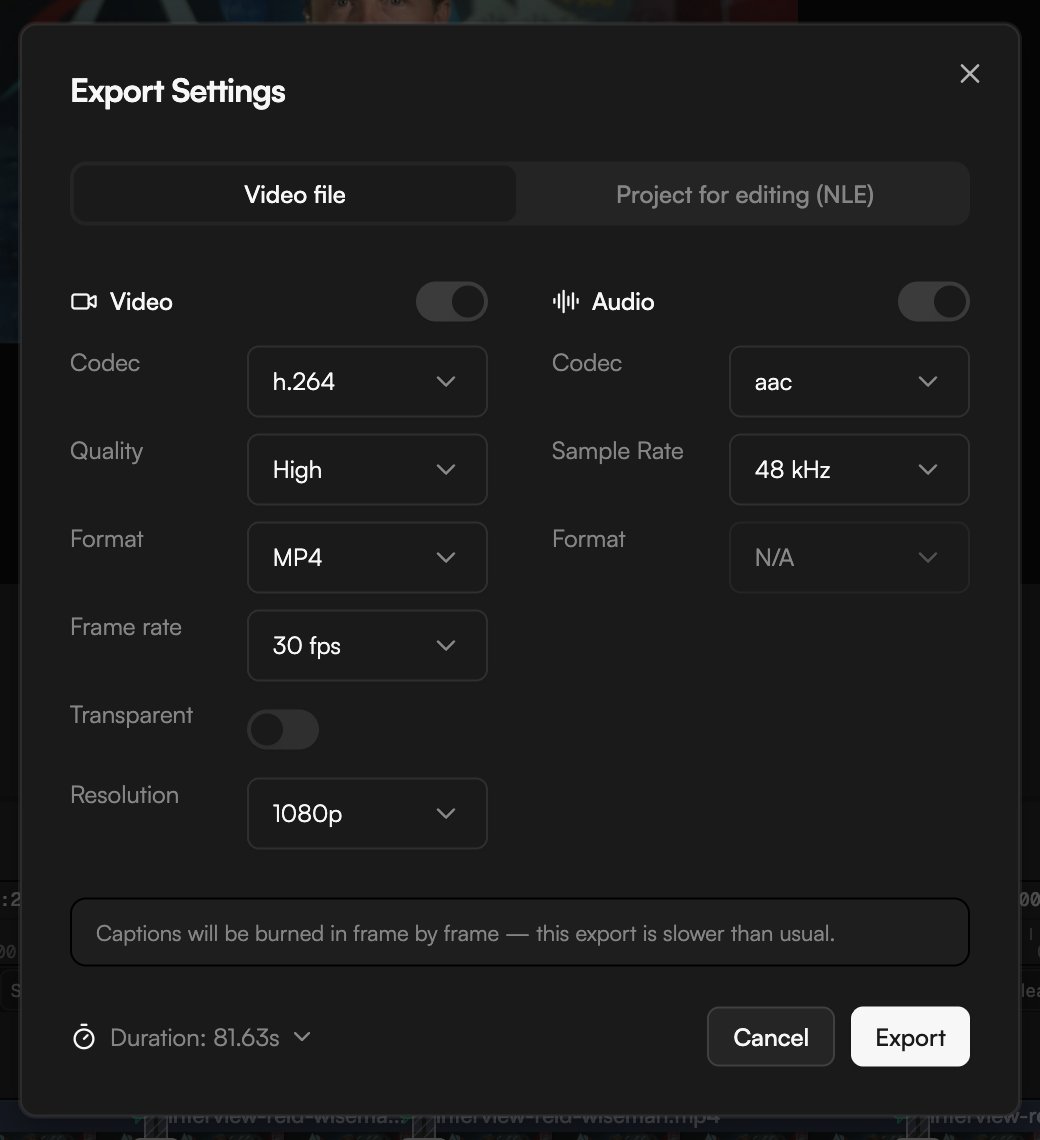
⌘E to open Export Settings. On the Video file tab, pick the codec, quality, format, frame rate and resolution (for example h.264, High, MP4, 30 fps, 1080p), choose the whole composition or a range up to a marker in the Duration dropdown, then click Export. Rendering happens in your browser, so keep the tab open and in the foreground until it finishes. Captions and motion graphics are burned into the file.On the Free plan exports are 720p with a small watermark. Creator unlocks 1080p, transparent exports and Project for editing (NLE) for Final Cut Pro, Premiere Pro and DaVinci Resolve; Pro unlocks 4K. See Export video.What it costs
Credits are the currency (1 credit = $0.01). The footer of every project shows how many credits you have left. Each agent prompt and each AI generation (images, video, voice, music, motion graphics) uses credits, as does transcription; editing by hand on the Timeline does not. The Free plan gives 150 credits a month plus 100 welcome credits, and up to 20 agent prompts a day. See Plans and credits.Where your work is saved
Projects autosave to the cloud every few seconds; the status in the top bar reads Saved, Saving… or Offline — changes stored locally. Version history keeps every change as a commit: manual snapshots, editing sessions and AI checkpoints. Restoring a version never deletes anything. See Version history and autosave.Vocabulary
- Agent layout: the chat-first workspace a project opens in; Preview and Media appear in a dock on the right when the agent produces results.
- Editor layout: the full editor with panels, Preview, chat and Timeline. Toggle with
⌘.. - Media pool: everything you have imported, recorded or generated in a project.
- Transcript: the text of your footage, with word timings and speakers, produced by Transcribe.
- Captions: on-screen text built from the transcript and styled with presets.
- Edit proposal: the card the agent shows before a large change, with a plan you approve or adjust.
- Skill: a packaged ability of the agent (captions, image generation, export and so on) that you run with
/or plain language. - Credits: the currency for agent prompts, AI generation and transcription.
Continue
- Meet GoFrame Editor Agent for modes, plans and how the agent reports its work.
- Editor layout for every panel, the top bar and the footer.
- Import media for formats, limits and Cloud Sync.
- Export video for every format, quality and resolution option.