

Sign in
Open app.goframe.dev. If you aren’t signed in, you land on the sign-in page: “Enter your email — we’ll send you a 6-digit sign-in code.”
With Google or Yandex
Click Continue with Google and pick your Google account. If you are in Russia or Belarus the button reads Continue with Yandex instead.With an email code
1
Send the code
Type your address in the Email field and click Send code. The page confirms “Code sent. Check your inbox.”
2
Enter your code
Copy the 6-digit code from the email into the Enter your code field and click Sign in. If nothing arrives, click Resend once the short countdown ends; “A new code has been sent.” confirms it.
Beta access
GoFrame Editor is in closed beta. After you sign in for the first time you may see a page titled goframe is in closed beta: “Access is invite-only while we scale. Enter an invite code to start creating — or join the waitlist.”Activate an invite code
Invite codes look likeGF-XXXX-XXXX. Under Have an invite code?, paste the code and click Activate. On success the page shows You’re in! with the welcome credits added to your account (an invite from a friend starts you with +100 bonus credits), and you continue to Home.
If a friend sent you an invite link rather than a bare code, opening it shows You’re invited to goframe with an Accept invite button. Sign in or create an account and the code is applied automatically.
A code can be refused for a few reasons, each with its own message:
Join the waitlist
No code yet? Under No invite yet? click Join the waitlist. You see You’re on the list with your position, and the note “We invite new members regularly, and early sign-ups go first.” You can enter a code from a friend at any time while you wait. The wall also shows which account you are signed in as, with a Log out link if you’d like to switch accounts.Invite friends
Once you’re in, you get a monthly quota of invites to share. Open Settings → Invites, or choose Invite friends from the account menu.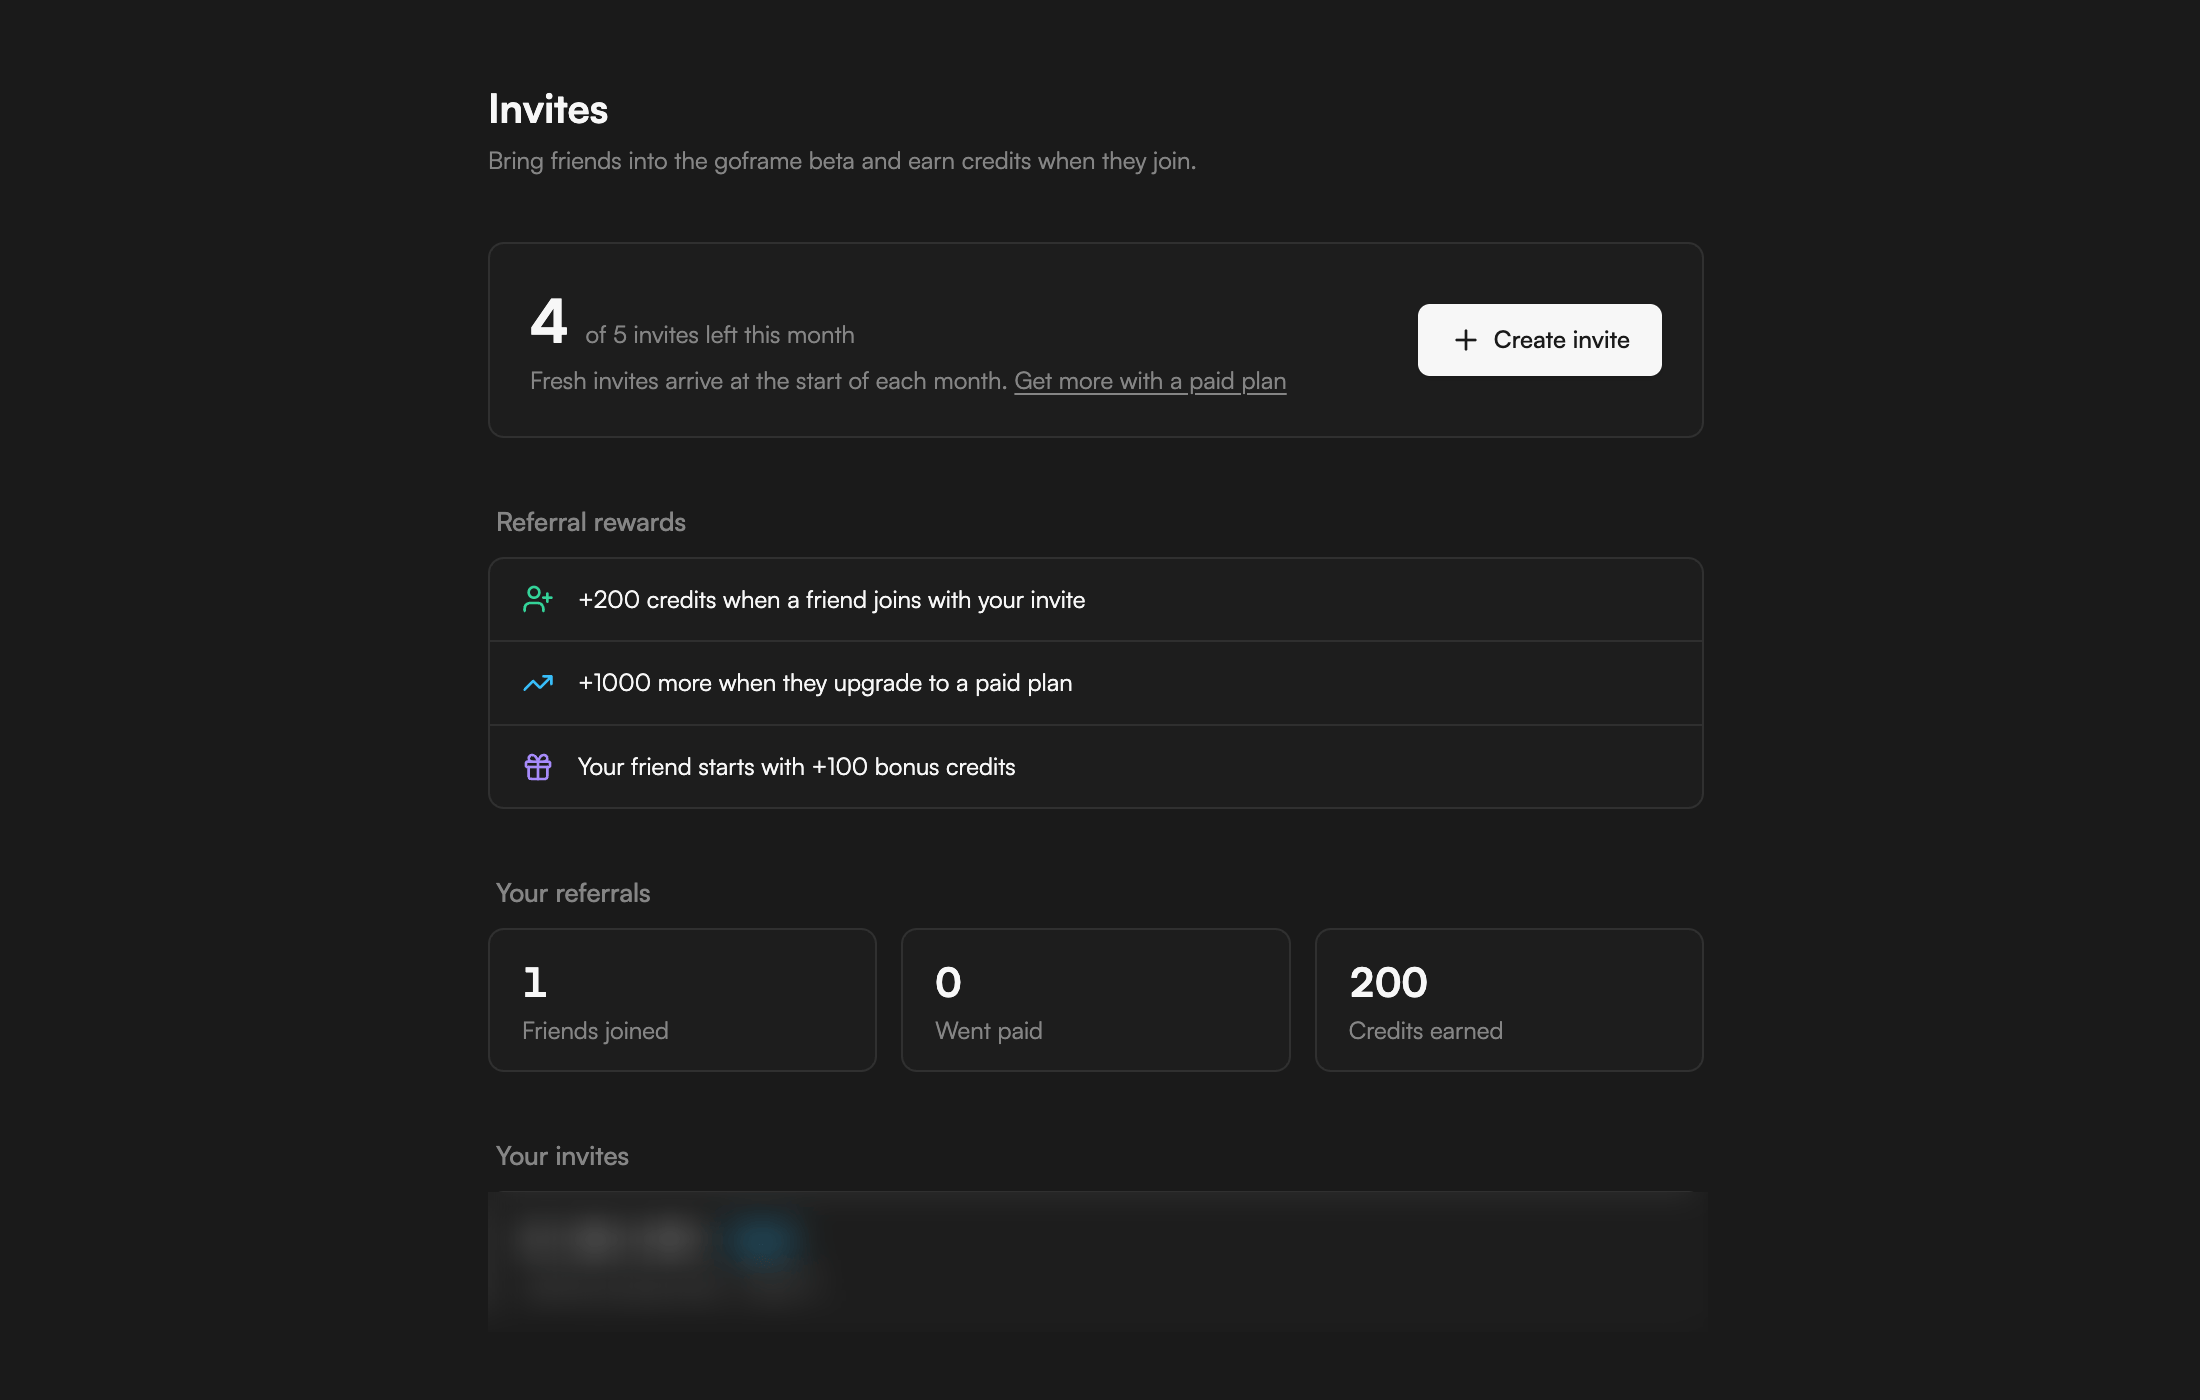
- The header shows how many invites you have left this month (for example “4 of 5 invites left this month”). The quota depends on your plan: 2 on Free, 5 on Creator, 10 on Pro. “Fresh invites arrive at the start of each month”, and Get more with a paid plan points you to the plans.
- Click Create invite to add a new code to the list.
- Your invites lists every invite with its code and status (for example Used), with Copy invite link to share it.
Referral rewards
Invites earn credits for both sides:- +200 credits for you when a friend joins with your invite.
- +1,000 more when that friend upgrades to a paid plan.
- +100 bonus credits for your friend when they start.
Project invites from collaborators
A project owner can also invite you to one project rather than to the beta. Opening their link while signed in joins the project as an Editor or Viewer, shows “You joined … as …”, then opens the project. If the link has expired, been revoked or reached its limit, you see This invite is no longer valid; ask the owner for a fresh one. See Share and collaborate.Log out and Copy User Id
On Home, open the account menu from your avatar and email at the bottom-left of the sidebar (the row also shows your plan); inside a project, your avatar sits in the rail on the left. Choose Log out. The same menu holds Settings, Invite friends, Language, Theme, Documentation and Copy User Id. Copy User Id copies your account identifier to the clipboard. Include it when you write to support so your account can be found quickly.Continue
- Home and projects for what you see after signing in.
- Settings for language, theme and the Invites section.
- Plans and credits for what welcome and referral credits buy.
- Troubleshooting if the code never arrives.