

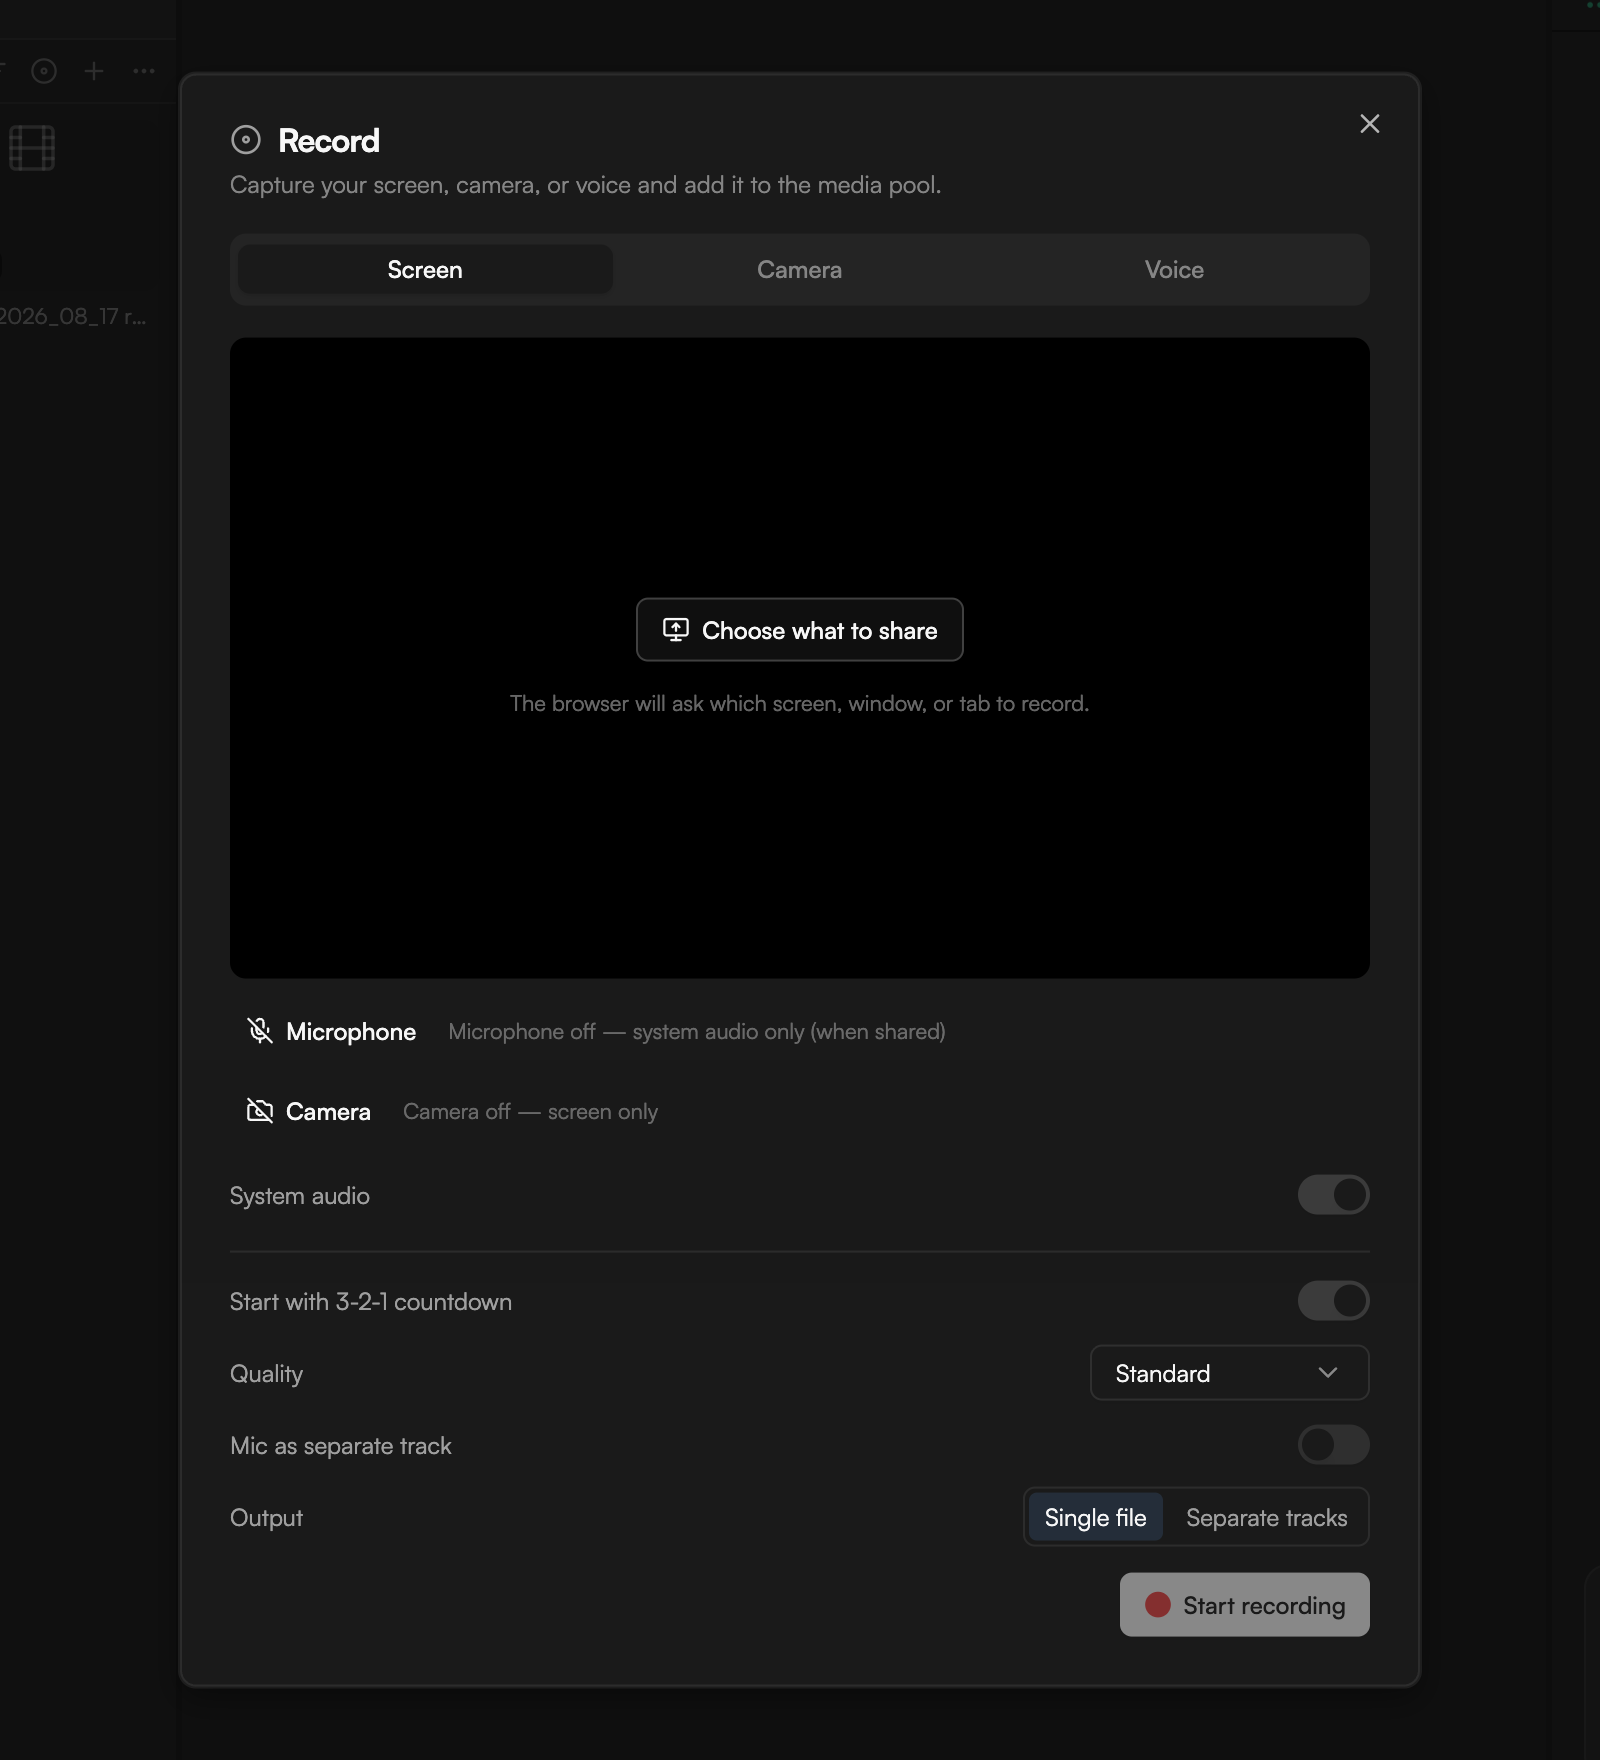
Choose what to record
The dialog has three tabs.- Screen
- Camera
- Voice
Click Choose what to share (“The browser will ask which screen, window, or tab to record.”).Options:
- Microphone: pick a device, or leave the mic off. With the mic off the dialog reads Microphone off — system audio only (when shared).
- System audio: include the sound of what you share.
- Camera: add your webcam on top of the screen. When it is off, the dialog reads Camera off — screen only. With the camera on, choose a Camera bubble shape (Circle or Rounded) and drag the bubble in the preview to position it.
- Output: Single file merges screen and camera into one video. Separate tracks saves them as separate synced assets, so you can reposition or cut the camera independently later.
- Mic as separate track: save your voice as its own audio asset. It is easier to edit, duck under music, or replace later.
Common options
- Quality: Standard (5 Mbps) or High (12 Mbps).
- Start with 3-2-1 countdown: gives you a moment to get in frame before capture starts.
Record
1
Start
Click Start recording. With the countdown on, capture begins after 3-2-1.
2
Pause and resume
Click Pause to hold the take and Resume to continue. You can keep using the editor while a recording runs.
3
Stop
Click Stop and wait a moment while the file is prepared.
Review and save
After you stop, the dialog shows the take with its file details and a player to check it.- Add to media: import the recording into the Media pool.
- Retake: discard this take and record again with the same settings.
- Download: save the file to your computer. With Separate tracks, every track is downloaded.
Very large takes may not persist in the browser’s local storage after a reload. Keep Cloud Sync on for them; see Import media.
Long recordings and 30-minute parts
Each take is saved in parts of up to 30 minutes. Nothing is lost when you pass the limit.- Shortly before the cap, the dialog warns you that the current part is about to reach the 30-minute limit. The part is then saved to media automatically and recording continues as the next part.
- You can also stop right away, or split into a new part immediately.
- Each saved part is a separate asset in the Media pool.
Permissions and troubleshooting
- Camera or microphone access denied: allow the device in your browser’s site settings and try again.
- Screen recording permission denied: allow screen sharing for the browser and choose a source when prompted.
- No camera, microphone or screen found: check that the device is connected and not in use by another app.
- Recording not supported: use a Chromium browser such as Chrome or Edge.
- Nothing was recorded: the take was empty. Check the selected source and try again.
- If the recording cannot be added to media, the take stays in the dialog; retry Add to media or Download the file so you do not lose it.